
Home Improvement
Beyond the Tank: Rethinking Septic System Alternatives
Septic system alternatives provide advanced wastewater treatment for properties where conventional systems fall short. Explore modern, efficient options for sustainable home waste management.

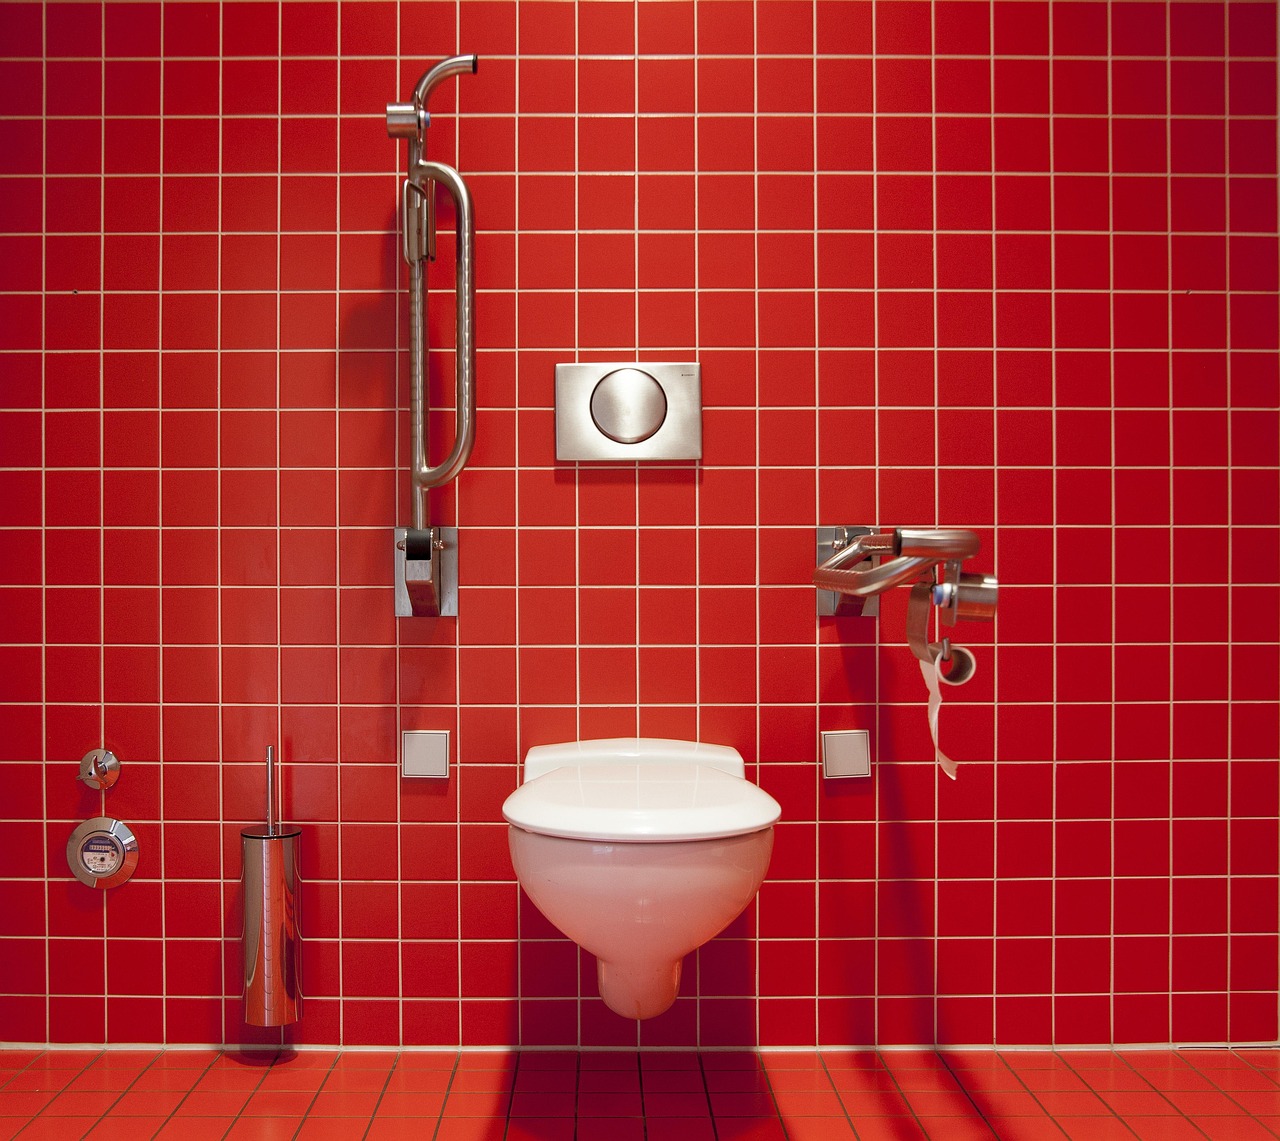
septic system alternatives treat household wastewater when high water tables, shallow bedrock, dense clay, or small lots prevent a standard gravity drain field. Key options include Aerobic Treatment Units (ATUs), mound systems, drip irrigation, media filters, and waterless composting toilets, which use active aeration, raised filtering beds, or water reduction to process waste safely.
A standard gravity septic tank relies on deep, unsaturated, permeable soil to filter liquid waste naturally. When your property lacks those conditions, raw or partially treated effluent cannot soak into the ground properly, leading to surface ponding, clogged leach fields, foul odors, and groundwater contamination. Advanced alternative treatment options solve these environmental constraints by treating effluent before it enters the soil or by reducing liquid waste generation altogether.
Why do conventional septic systems fail on difficult sites?
Conventional septic systems rely on a basic two-part design: a septic tank that separates solids from liquids through gravity, and a drain field (leach field) where soil bacteria filter out pathogens and organic matter. This process requires continuous vertical clearance through unsaturated soil that percolates at an acceptable rate—typically between 1 and 60 minutes per inch.
When site conditions deviate from these ideal parameters, standard systems fail in distinct ways:
- Dense clay soils: Clay particles pack tightly together, severely limiting water movement. Liquid effluent collects in the leach trenches without soaking in, eventually backing up into household drains or breaking out onto the surface of the yard.
- Coarse gravel or sandy soils: Water drains through gravelly sand too quickly. Effluent passes into underlying aquifers before soil microbes have enough time to digest bacteria, viruses, and dissolved nitrates.
- High water tables and shallow bedrock: Health codes require 2 to 4 feet of unsaturated soil beneath the bottom of drain field pipes. A high seasonal water table or shallow ledge rock submerges the soil column, allowing untreated waste to enter local groundwater sources directly.
- Small lot sizes and waterfront setbacks: Tight property lines, steep slopes, or close proximity to lakes, wells, and wetlands leave insufficient physical space for a standard 1,000-square-foot drain field and its required safety buffer zones.
How do Aerobic Treatment Units (ATUs) work?
Aerobic Treatment Units (ATUs) serve as miniature municipal wastewater plants for individual homes. While traditional septic tanks rely on anaerobic (oxygen-free) bacteria that digest waste slowly, an ATU introduces oxygen directly into the treatment tank to cultivate aerobic bacteria. Aerobic microbes break down organic matter significantly faster and more thoroughly than anaerobic organisms.
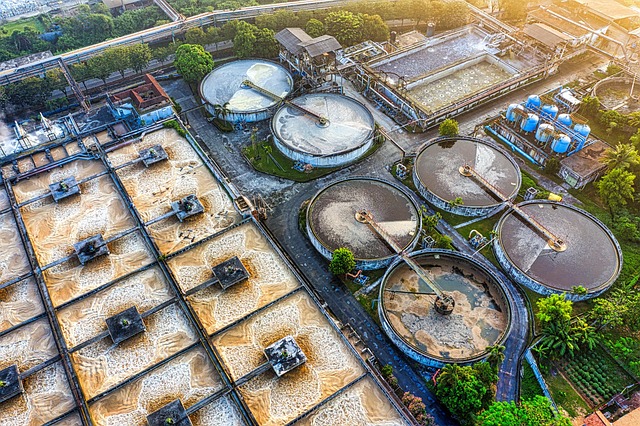
A typical ATU uses a three-compartment tank to clean wastewater:
- Trash tank (Pre-treatment chamber): Heavy solids settle to the bottom as sludge, while fats, oils, and grease float to the top as scum. The clearer middle layer flows into the next chamber.
- Aeration chamber: An electric air compressor pumps continuous air into the liquid through diffuser pipes or air injectors. This oxygenates the liquid and keeps aerobic bacteria suspended so they can digest biological waste.
- Clarification chamber: The oxygenated liquid sits quietly so remaining biological solids settle back to the bottom for re-processing. The clarified liquid effluent at the surface leaves the tank up to 98% cleaner than raw sewage.
Because ATU effluent is pre-treated to high standards, local environmental agencies often allow discharge into smaller leach fields, shallow drip lines, or specialized sand filters. However, ATUs require continuous electricity to run the air pump and must be inspected regularly. Mechanical blowers can fail, and biological balances can be disrupted if harsh household chemicals enter the system. Servicing contracts typically run $200 to $500 per year depending on local regulation requirements.
What are sand mound systems and when are they required?
When native soil layer thickness over bedrock or groundwater measures less than two feet, a sand mound system elevates the absorption bed above the natural ground level. Instead of digging down into unsuited soil, contractors build a raised filtering bed on top of the existing terrain.
A mound system consists of several engineered layers built above scarified natural ground:
- Dosing tank: Effluent flows from a primary septic tank into a dosing chamber equipped with an electric submersible pump and float switches.
- Clean sand layer: Clean, washed sand is stacked 1 to 3 feet high in a sloped bed over native topsoil.
- Aggregate distribution bed: A layer of gravel sits on top of the sand, containing network distribution pipes with small downward-facing holes.
- Topsoil cap: Fabric liner covers the gravel bed, topped with 6 inches of native soil and seeded with grass to prevent erosion.
The dosing pump sends controlled bursts of liquid effluent into the gravel bed multiple times per day. Effluent drips evenly down through the clean sand layer, undergoing biological purification before reaching native soil. Mound systems provide a proven solution for shallow soils, but they carry high installation costs ranging from $15,000 to $30,000 due to extensive earthmoving, material transport, and custom hydraulic engineering. They also occupy a prominent footprint and create a visible hill in the yard.
How does subsurface drip irrigation septic work?
Drip irrigation septic systems release pre-treated liquid effluent into the upper 6 to 12 inches of the topsoil—the layer with the highest concentration of soil microbes and plant roots. Unlike surface landscape drip lines, wastewater drip irrigation uses specialized pressure-compensating tubing buried shallowly underground.
Because tiny drip emitters clog easily, wastewater must first pass through an advanced pre-treatment unit—such as an ATU, sand filter, or peat media bed—and then through a fine disc or screen filter. A high-pressure pump pushes the filtered liquid into a network of flexible polyethylene tubing spread across the field in thin lines.
Key advantages of drip irrigation include:
- Flexibility around trees, landscape beds, and sloped terrain without heavy excavation.
- High absorption rates in clay soil because liquid is distributed evenly in micro-doses rather than concentrated trenches.
- Effective nitrogen uptake by turf grass roots during the active growing season.
- Minimal surface scarring during installation.
Drip system installations typically range from $12,000 to $28,000. Maintenance requires inspecting backwash filtration systems, checking pressure gauges, and occasionally flushing chemical root-inhibiting agents through lines to prevent root intrusion.
What are media filters: sand, peat, and synthetic systems?
Media filters act as biological sponges placed between a standard septic tank and a drain field. Effluent drips through packed filtering materials, where beneficial microbes living on the media digest organic pollutants and strain out suspended solids.
Sand filters
Sand filters direct tank effluent over beds of graded coarse sand contained within concrete or waterproof membrane enclosures. In single-pass systems, effluent trickles down through sand once before entering subsurface soil. Recirculating sand filters loop liquid back through the sand bed multiple times, producing exceptionally clean effluent suitable for sensitive waterfront lots or shallow drip dispersal networks.
Peat moss filters
Peat filters pass septic effluent through packed modules of natural sphagnum peat moss fibers. Peat provides physical straining, acidic biological treatment, and chemical absorption. Peat modules handle fluctuating water volumes well, making them ideal for seasonal cabins or vacation properties. The peat media gradually degrades over time and requires complete replacement every 10 to 15 years.
Synthetic media filters
Synthetic treatment units utilize engineered foam cubes, geotextile fabric sheets, or plastic media rings enclosed inside underground fiberglass tanks. Synthetic materials provide an exceptionally high surface area for bacterial growth in a small container, offering long operational life without media compacting or decaying.
How do waterless composting and incinerating toilets work?
Waterless toilets address wastewater challenges at the source by eliminating water flush toilets entirely. They remove human waste (blackwater) from the plumbing stream, leaving only household graywater from sinks, showers, and laundry to be managed separately.
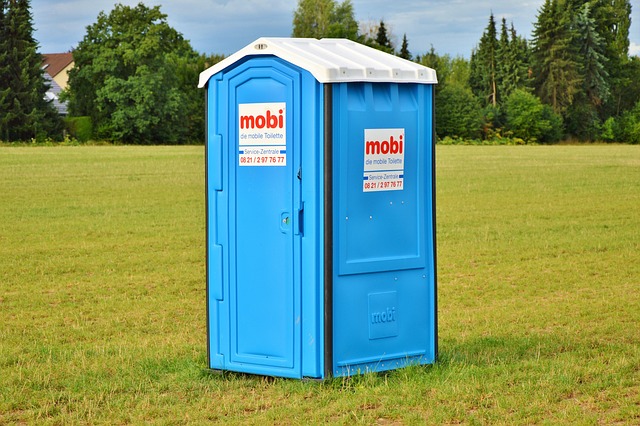
Composting toilets
Composting toilets separate liquid and solid waste to maintain aerobic decomposition conditions. Solid waste drops into a ventilated compost chamber, where oxygen, natural heat, and biological bulking agents—such as coarse sawdust, coconut coir, or peat moss—turn human waste into dry, odor-free organic matter over 6 to 12 months.
Self-contained units house the toilet bowl and composting chamber in a single bathroom fixture, costing between $1,000 and $3,000. Central composting systems feature standard-looking porcelain waterless bowls in upper-floor bathrooms that drain down into large multi-chamber composting bins located in a basement or utility room, costing $3,000 to $6,000.
Incinerating toilets
Incinerating toilets burn human waste into sterile ash using electric heating coils or propane gas burners. After closing the toilet lid, a high-heat burn cycle activates, raising the burn pot temperature to approximately 1,000°F (538°C).
Incinerating systems require no water, function cleanly in freezing temperatures, and produce only a small scoop of clean ash every few weeks. However, they draw substantial power (roughly 1.5 to 2 kilowatt-hours per flush cycle) and require stainless steel chimney venting through the wall or roof.
What handling is required for greywater when using waterless systems?
However, household sinks, showers, bathtubs, and washing machines still generate 40 to 80 gallons of greywater per person each day.
Greywater contains hair, soap residue, lint, food particles, and trace pathogens. It cannot be legally dumped directly onto bare ground in most jurisdictions. Managing greywater alongside waterless toilets requires a dedicated disposal system:
- Reduced-size leach fields: Because greywater lacks solid sewage, local health codes often permit a smaller greywater septic tank and reduced trench leach field, lowering site footprint and trench costs.
- Subsurface greywater mulch basins: In rural zones that allow greywater reuse, lint-filtered water drains into subsurface mulch trenches around fruit trees or ornamental landscape beds.
- Sand or textile greywater filters: Compact greywater filtration tanks purify wash water so it can feed subsurface lawn drip networks safely.
Comparing septic system alternatives: cost, footprint, and suitability
Choosing the right alternative system depends on site constraints, regional weather patterns, household size, and budget limits. See Concrete Driveway Cost: Your Essential Budget Guide for detailed site preparation requirements before selecting hardware.
| System Type | Ideal Site Conditions | Key Benefits | Potential Drawbacks | Typical Cost Range |
|---|---|---|---|---|
| Aerobic Treatment Unit (ATU) | Small lots, clay soils, high seasonal water tables | High effluent quality, smaller leach field footprint | Requires continuous electricity, ongoing service contract | $10,000 – $25,000 |
| Sand Mound System | Shallow bedrock, high water tables, rocky terrain | Creates vertical soil clearance above rock or water | Large physical footprint, elevated mound landscape impact | $15,000 – $30,000 |
| Drip Irrigation System | Sloped yards, heavily wooded lots, tight clay soil | Shallow installation, shallow lawn distribution, invisible above ground | Requires secondary treatment units, emitter filter maintenance | $12,000 – $28,000 |
| Peat / Media Filter System | Intermittent use, seasonal homes, sensitive lakeshores | Consistent filtration, low power use, handles fluctuating loads | Filter media replacement needed every 10 to 15 years | $10,000 – $22,000 |
| Composting Toilet System | Off-grid structures, zero-water sites, remote cabins | Eliminates water flush, no blackwater septic tank needed | Requires manual tray emptying, separate greywater system needed | $1,000 – $5,000 |
Step-by-step process for choosing and installing an alternative septic system
Installing an advanced onsite wastewater system requires formal professional design, site testing, and regulatory sign-offs. Follow these sequential steps:
- Hire a certified soil scientist or sanitarian: Schedule a formal site evaluation. The evaluator digs deep test pits with a backhoe to inspect soil horizons, measure rock depth, establish seasonal high water table levels, and run percolation tests.
- Hire a professional engineer or system designer: Select an engineered system tailored to your soil report and local health board regulations. The designer calculates daily flow rates (gallons per day based on bedroom count) and produces detailed hydraulic schematics.
- Submit permit applications: Submit engineering blueprints, soil evaluation reports, and draft maintenance service contracts to your city or county health department for administrative review.
- Hire a licensed wastewater installer: Select a licensed site contractor trained in advanced systems. Installation involves tank placement, electrical control panel wiring, pressure-dosing pump installation, and specialized field soil preparation.
- Pass final inspection and obtain operating permit: The local health authority inspects pipe slopes, pump wiring, sand media purity, and float switches before backfilling. Once approved, the agency issues an operating permit.
Common problems with alternative septic systems and how to fix them
Mechanical components, pumps, filters, and biological media require active oversight. Addressing early symptoms prevents major repairs:
- Foul sewage odor near an ATU tank: Smells indicate aerobic bacteria are dying due to lack of oxygen or chemical poisoning. Check electrical panels for tripped breakers. If the air pump motor runs but delivers no pressure, replace worn rubber aerator diaphragms. Avoid pouring bleach or drain cleaners down sinks.
- High-water alarm sounding in dosing chamber: A buzzing control panel alarm signals elevated water levels. Inspect pump float switches to ensure they move freely. Check circuit fuses and test the electrical outlet. If float switches function but the pump does not run, replace the submersible pump capacitor or pump unit.
- Subsurface drip field alarm or pressure drop: Low pressure across drip lines indicates silt build-up or biological growth blocking emitter openings. Manually trigger a disc filter backwash cycle, clear line strainers, and flush lateral drip pipes using clean water supply valves.
- Water pooling at the edge (toe) of a sand mound: Effluent breaking out at the base of a mound indicates pump timer miscalibration or soil compaction beneath the sand layer. Adjust dosing control timers to send smaller, more frequent liquid doses, allowing the sand bed time to drain between cycles.
- Gnat or fly infestation in a composting toilet: Excessive moisture or unbuffered acidic waste creates conditions favorable to drain flies. Add dry wood shavings or coarse peat moss to absorb liquid, check continuous operation of the electric exhaust fan, and ensure the vent stack bug screen remains clear.
Who are alternative septic systems NOT right for?
While advanced treatment systems solve tough engineering challenges, they do not suit every property owner or location:
- Homeowners seeking zero operational costs: Advanced systems use electric pumps, blowers, pressure switches, and continuous control monitors. Expect modest monthly power bill increases and mandatory annual servicing expenses.
- Properties with near-term public sewer access: If municipal sewer line extensions are scheduled within a few years, spending $20,000+ on an advanced onsite system is rarely cost-effective compared to temporary holding tank permits or minor conventional field repairs.
- DIY builders in strict regulatory jurisdictions: Most municipal health codes strictly prohibit unlicensed property owners from self-installing or servicing ATUs, mound fields, or drip systems. Maintenance must be documented by certified service providers to maintain valid home occupancy permits.
Sources: Types of Septic Systems
Frequently asked questions
Are septic system alternatives more expensive to install than standard systems?
Yes, alternative systems generally cost more upfront due to electrical pumps, control panels, continuous filtration media, and custom civil engineering requirements. However, they make site development possible on properties where standard gravity septic systems are legally prohibited or guaranteed to fail.
Can I install a septic system alternative myself?
No, virtually all local health departments require certified wastewater contractors to install advanced systems like ATUs, sand mounds, or drip fields. Uncertified DIY installations violate health codes, void manufacturer warranties, and prevent homes from receiving valid occupancy permits.
How do you handle greywater when using a waterless composting toilet?
Waterless composting toilets only process blackwater from human waste, so greywater from sinks, showers, and laundry must still route to an approved disposal system. This typically requires a smaller dedicated greywater tank, a mulch filtration basin, or a reduced-size drain field approved by local health authorities.
How often do Aerobic Treatment Units (ATUs) require servicing?
ATUs require mechanical inspection every six to twelve months by a certified technician to verify air pump output, inspect biological clarity, clean intake filters, and test alarm panels. Tank sludge pumping is typically required every three to five years.
Do advanced wastewater systems increase residential property value?
A fully permitted and functioning alternative system protects property value by ensuring a home meets local environmental codes and remains fully usable. It prevents costly real estate sales delays caused by failing conventional drain fields during pre-sale septic inspections.







Home Improvement
Septic Replacement: Your Essential Guide to a Smooth Upgrade
A failing septic system can quickly become a homeowner’s nightmare. Septic replacement is a complex, costly, but often unavoidable project that ensures your home’s waste management is safe and efficient. This guide walks you through the entire process.
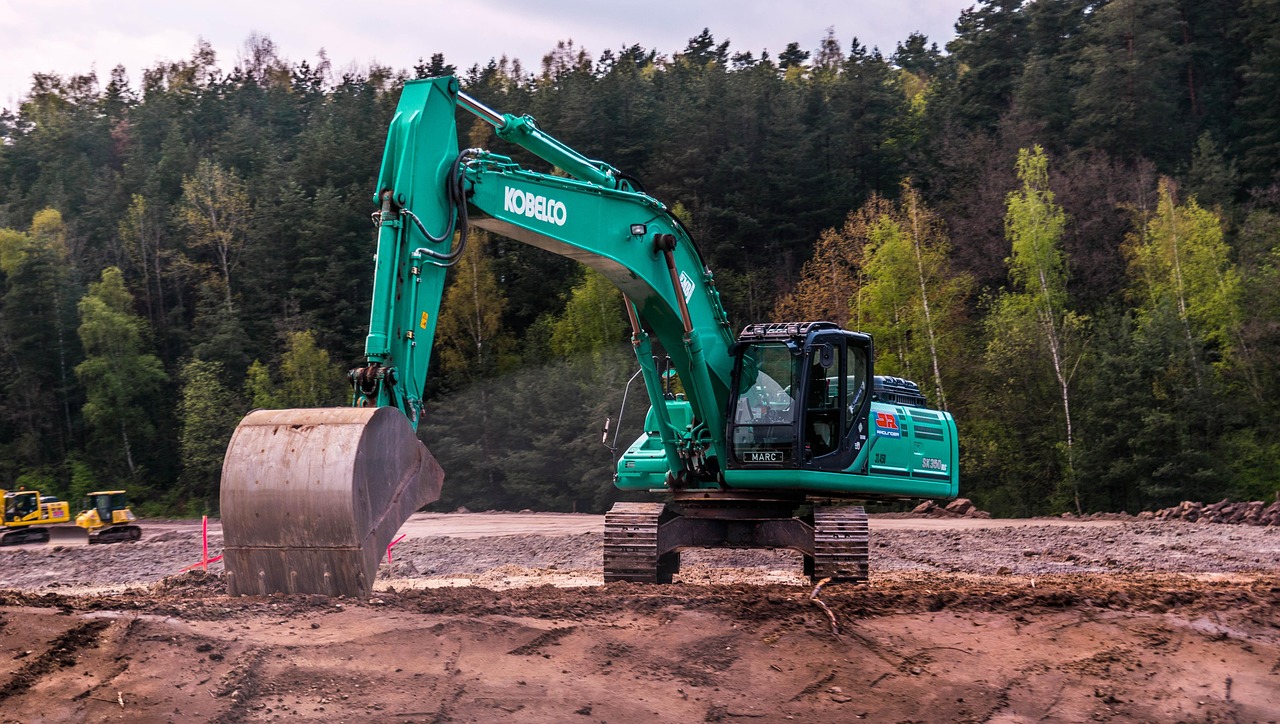
A septic replacement involves excavating your existing tank and drainfield, performing site and soil evaluations, obtaining local health permits, and installing a new wastewater system. Most residential replacements cost between $12,000 and $25,000 and take two to six weeks from initial soil testing to final grading. Dealing with a failing wastewater setup can feel overwhelming, but understanding every stage of a septic replacement can turn a chaotic household emergency into a manageable home improvement project.
How do you know if your septic system needs to be replaced?
Determining whether to repair individual components or undertake a full septic replacement depends on the severity and location of the failure. Minor issues, such as a clogged inlet pipe, a broken distribution box baffle, or a failed effluent pump, can usually be repaired for a fraction of the cost of a new system. However, structural damage to the tank or systemic failure of the drainfield requires a complete system overhaul.
The most common warning signs that indicate a critical septic failure include:
- Sewage Backups: Wastewater or blackwater surfacing in home fixtures, such as basement drains, showers, or ground-floor toilets, during normal household water use.
- Persistent Sewage Odors: Foul, sulfurous odors around the septic tank area, over the leach field, or wafting near outdoor vents.
- Surfacing Effluent and Soggy Soil: Pooling, muddy water or standing sewage collecting over the drainfield trenches, even during dry weather.
- Unusually Lush Lawn Patches: Exceptionally bright green, thick grass growing directly over the absorption field, caused by untreated wastewater providing excessive nitrogen and water to the surface roots.
- Slow Drainage Throughout the House: Multiple plumbing fixtures draining slowly despite clearing local line clogs with a drain snake or plunger.
Conventional septic systems typically have an operational lifespan of 20 to 40 years. Over decades, organic solids build up, and fine soil particles in the drainfield become clogged with a thick microbial layer called biomat. Once biomat permanently seals the surrounding soil, the soil loses its percolation capacity, preventing liquid effluent from filtering down through the ground. In other cases, older concrete tanks suffer structural degradation from hydrogen sulfide gas corrosion, causing lids or side walls to collapse, while shifting soil or severe freeze-thaw cycles can crack the tank shell beyond repair.
To confirm whether replacement is mandatory, a licensed septic professional conducts a diagnostic evaluation. This includes running a sewer camera through main lines, opening tank access risers to check liquid levels, and conducting a hydraulic load test to evaluate drainfield absorption rate.
How much does a septic replacement cost?
A full residential septic replacement typically costs between $12,000 and $25,000. However, final expenses vary substantially depending on geographic location, local health code regulations, soil percolation results, tank material, and overall system design.

Cost breakdown by project scope
- Full System Replacement ($12,000 – $25,000+): Involves decommissioning and removing or filling the old tank, excavating a new placement area, installing a new tank, laying down new distribution lines and absorption media, and completing site grading.
- Drainfield Replacement Only ($3,000 – $7,000): Necessary when the existing septic tank remains structurally sound and watertight, but the soil surrounding the leach field has become clogged or saturated beyond recovery.
- Septic Tank Replacement Only ($5,000 – $10,000): Performed when an older tank has cracked, collapsed, or suffered severe chemical degradation, while the drainfield passes inspection and continues to absorb effluent properly.
Cost breakdown by system technology
- Conventional Gravity-Fed System ($12,000 – $20,000): Utilizes simple gravity to move effluent from the tank into stone-and-pipe trenches or gravelless chamber systems. Requires deep, well-draining soil and favorable topography.
- Aerobic Treatment Unit (ATU) System ($18,000 – $35,000+): Incorporates an electric air compressor to oxygenate wastewater inside the tank, accelerating bacterial decomposition. Required for properties with poor soil, small lot sizes, or high water tables.
- Mound System ($15,000 – $30,000): Involves building an elevated bed of clean sand and soil above native ground level to provide safe filtration where bedrock or groundwater sits close to the surface.
Key cost drivers to keep in mind
Several site-specific variables can push your replacement costs higher:
- Soil Composition: Coarse sand and sandy loam drain easily and lower excavation costs. Heavy clay, compacted hardpan, or rocky terrain requires specialized equipment, additional filter media, or engineered system designs.
- Water Table and Bedrock Depth: High water tables or shallow ledge rock prevent standard gravity drainfields, requiring mechanical pumps or elevated mounds.
- Site Accessibility and Landscaping: Narrow access paths, dense tree canopy requiring stump clearing, steep slopes, or existing structures like decks and driveways increase heavy equipment labor time.
- Permitting and Engineering Fees: Soil perc tests, site topography mapping, civil engineering designs, and local municipal permit fees generally cost between $500 and $2,500 prior to excavation.
Which septic system type is right for your property?
Selecting the correct system depends primarily on your property’s soil percolation rate, depth to groundwater, total lot acreage, and local environmental standards.
Conventional septic systems
Conventional systems rely on gravity to transport liquid wastewater from the septic tank into an underground network of perforated pipes set in gravel trenches or plastic leach chambers. As effluent trickles into the soil, natural soil microbes filter out pathogens before the water recharges ground aquifers. Conventional systems are the most reliable and affordable choice for properties with well-draining soil and deep groundwater tables.
When selecting a conventional system, choosing the right tank material is critical:
- Concrete Tanks: Exceptionally heavy and durable, resisting soil flotation forces. However, concrete can crack under severe soil movement or suffer hydrogen sulfide acid corrosion over several decades.
- Plastic (Polyethylene) Tanks: Rust-proof, highly chemical-resistant, and lightweight for easy installation in tight spaces. Because they are lighter, plastic tanks require concrete anchors or ballast in areas with high seasonal water tables to prevent flotation when pumped dry.
- Fiberglass Tanks: Completely non-porous, lightweight, and impervious to chemical degradation. They offer exceptional longevity but carry higher initial material costs.
Septic tank capacity is determined by household size and bedroom count. A 1,000-gallon tank is standard for homes with 1 to 3 bedrooms, while a 1,500-gallon tank is typically required for 4 to 5 bedrooms.
Engineered and alternative septic systems
When a property fails standard soil percolation tests or lacks sufficient unpaved acreage, an engineered system is necessary:
- Aerobic Treatment Units (ATUs): Act like small-scale municipal treatment plants by forcing oxygen into the treatment chamber. Aerobic bacteria break down organic waste much faster than anaerobic bacteria, resulting in much cleaner effluent that requires a smaller soil absorption area.
- Mound Systems: Constructed above natural ground level when bedrock, heavy clay, or seasonal high water tables are within two to three feet of the surface. Wastewater is pumped in controlled doses from a dosing tank up into an elevated sand mound.
- Drip Irrigation Systems: Use flexible tubing buried 6 to 12 inches below the lawn surface to slowly release treated wastewater directly into the plant root zone, eliminating the need for deep trench excavation.
Comparing conventional vs. aerobic septic systems
| Feature | Conventional Septic System | Aerobic Treatment Unit (ATU) System |
|---|---|---|
| Mechanism | Gravity-fed; relies on passive anaerobic digestion and soil filtration | Electric air pump introduces oxygen to accelerate active bacterial breakdown |
| Suitability | Well-draining sandy soil, low water table, ample open property space | Clay soils, shallow bedrock, high water table, or restricted lot sizes |
| Installation Cost | $12,000 to $20,000 | $18,000 to $35,000+ |
| Maintenance Requirements | Tank pumping every 3 to 5 years; simple inspection schedules | Pumping every 1 to 3 years; electrical pump servicing; annual service contracts |
| Effluent Quality | Basic primary treatment before soil absorption field | High-grade secondary treatment discharging cleaner liquid to shallow soil |
What is the step-by-step septic replacement process?
A full septic replacement involves multiple distinct steps, moving from initial site testing to ground restoration. Following this sequential procedure ensures your new system meets regional public health standards and operates safely for decades.
- Initial Assessment & Soil Percolation Testing: A licensed site evaluator or civil engineer tests your property soil. They dig test pits to analyze soil horizons, check for groundwater depth, and perform percolation (perc) tests to calculate how quickly water absorbs into the ground.
- Engineering & System Design: Using the perc test data, daily household water calculations, and lot topography, a designer produces a detailed blueprint specifying tank dimensions, pipe slopes, pump requirements, and leach field square footage.
- Permitting & Health Department Approval: The engineering design is submitted to your local county health department or environmental protection agency. Municipal officials review plans for setback compliance and issue installation permits.
- Contractor Bidding & Selection: You request detailed bids from licensed, insured septic installation contractors. Bids should include explicit costs for tank procurement, pipe materials, earthmoving, inspection scheduling, and backfilling.
- Pumping, Decommissioning, & Excavation: A pumper empties the contents of the old septic tank. Workers collapse or crush old concrete structures and fill them with clean sand or soil, or excavate and haul them away. Heavy machinery excavates holes for the new tank and trenches for the distribution field.
- Component Installation: The contractor sets the new tank level on a compacted gravel bed, installs inlet and outlet plumbing lines, sets distribution boxes, and lays down drainfield chambers or gravel trenches according to approved engineered plans.
- Official Inspection & Testing: Before backfilling, a municipal health inspector evaluates the open installation. They verify pipe pitch, riser height, tank elevation, and material specifications, certifying that the work matches approved permit designs.
- Backfilling, Final Grading, & Site Stabilization: Workers cover pipes and tanks with clean fill, grade the yard surface to direct surface runoff water away from the leach field, and spread grass seed or straw to prevent soil erosion.
How do permits and local environmental regulations work?
Navigating municipal code requirements is essential during any septic replacement. Local health codes dictate where wastewater components can sit relative to home foundations, property lines, water mains, and natural features. These mandatory distance buffers, known as setback requirements, protect public health and prevent drinking water contamination.

Standard setback distances enforced by most local health agencies include:
- Distance from Private Water Wells: 50 to 100 feet minimum from tanks and drainfields.
- Distance from Property Boundaries: 10 to 20 feet from adjacent property lines.
- Distance from Surface Waters: 50 to 100 feet from streams, ponds, lakes, or wetlands.
- Distance from Structures: 5 to 10 feet from home foundations, retaining walls, or swimming pools.
Bypassing permits or installing a system without official inspection is illegal in almost all jurisdictions. Doing so can trigger steep daily fines, force you to excavate and remove unapproved components at your own expense, and prevent you from legally transferring property title during a future real estate sale. Proper siting and permit oversight prevent contamination of shallow groundwater and nearby drinking sources. The EPA provides foundational guidance on septic system basics.
What financial assistance programs are available for septic replacement?
Because unexpected septic replacement costs can create financial stress, several public assistance programs offer low-interest financing, grants, or tax rebates for qualified property owners.
Federal assistance programs
Rural homeowners can access federal aid programs tailored to critical infrastructure repairs. For example, the U.S. Department of Agriculture (USDA) Rural Development Single Family Housing Repair Loans & Grants program (Section 504) offers low-interest loans and direct grants to low-income seniors and families in eligible rural communities to eliminate health and safety hazards.
State and county revolving loan funds
Many state environmental departments operate Clean Water State Revolving Funds (CWSRF). These programs partner with local credit unions and banks to provide low-interest loans ($20,000 to $30,000+) with extended repayment terms for residential septic upgrades. Additionally, local county health departments frequently offer localized grant programs in environmentally sensitive areas, such as coastal regions or watersheds prone to algae blooms.
To explore available funding options in your county or regional watershed, consult local health officials and financial assistance databases. The Septic Guide offers a useful overview of financial assistance options.
How to select and hire a qualified septic contractor
Hiring a skilled installer is essential to ensure your replacement system operates smoothly for decades without premature structural or drainage failure.
When evaluating prospective contractors, follow these vetting steps:
- Verify Credentials: Ensure the contractor holds a valid state septic installer’s license, general contractor registration, active commercial general liability insurance, and worker’s compensation coverage.
- Obtain Three Itemized Quotes: Compare detailed bids from at least three licensed installers. Each quote should explicitly break down costs for permit management, materials (tank size/type, pipe schedules), machinery operator labor, site backfilling, and final site grading.
- Inquire About Warranty Terms: Confirm the installer provides a written warranty covering both labor and material defects for a minimum of 1 to 3 years post-installation. Clarify which actions (e.g., driving vehicles over leach trenches or dumping improper chemicals down drains) void warranty coverage.
- Ask About Experience with Specific System Types: If your property requires an ATU, mound, or drip irrigation system, ensure the contractor has verifiable experience installing that specific engineered model.
Be cautious of contractors who demand full payment upfront, request that you pull installation permits in your own name, or offer verbal quotes significantly below competing market bids without an itemized scope of work.
Real-world septic replacement scenarios
Understanding how physical site constraints impact practical system design helps clarify why installation requirements vary dramatically between properties.
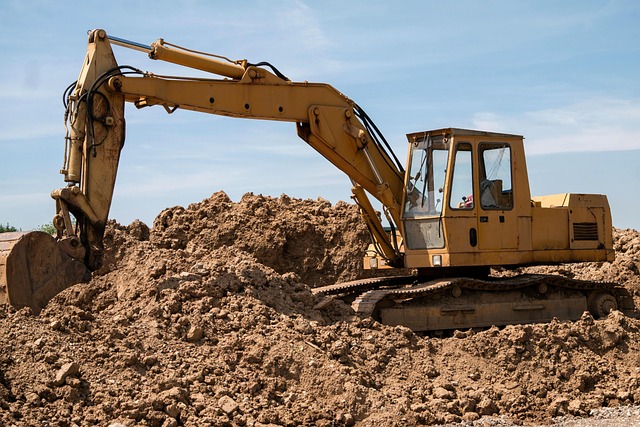
Consider a coastal home in Florida facing persistent drainfield saturation due to a high seasonal water table. A standard deep gravity drainfield was impossible because groundwater sat just 18 inches below the ground surface. The homeowners resolved the issue by installing an Aerobic Treatment Unit paired with a shallow subsurface drip irrigation field, costing approximately $25,000. While the advanced treatment technology required higher upfront capital, it met strict regional environmental codes and provided complete, safe wastewater treatment in saturated soil.
In another scenario, a homeowner in a northern climate experienced structural failure when an aging concrete septic tank cracked due to frost heave and ground movement. Because the existing drainfield passed percolation testing and remained unsaturated, only the tank required replacement. The owner selected a high-density, rust-proof fiberglass tank to withstand cold-climate ground shifting. The total tank replacement and sewer line tie-in cost approximately $14,000, restoring the system to full operation while preserving the functional drainfield.
What common mistakes should you avoid during septic replacement?
Avoiding frequent planning and operational errors during a replacement project saves thousands of dollars and prevents premature system degradation.
Key mistakes homeowners should avoid include:
- Skipping Soil Percolation Tests: Attempting to install a new drainfield on an existing footprint without updated soil testing often leads to quick failure if soil conditions have deteriorated or local groundwater levels have shifted.
- Selecting Contractors Based Solely on Price: Choosing the lowest bidder who uses inferior thin-walled PVC pipes or unapproved backfill media can lead to crushed lines, settling, and costly repairs within a few years.
- Failing to Plan for Future Maintenance: Mechanical systems like aerobic units require continuous electrical power and biannual maintenance checks. Ignoring these ongoing operational needs results in rapid component burnout. Understanding these nuances helps avoid future problems.
- Overlooking Everyday Operation and Water Usage: After investing in a new system, habits must adapt to protect the bio-balance. For Drain Cleanout: Your Plumbing System’s Cost-Saving Secret on long-term property maintenance, establishing routine inspection schedules prevents costly plumbing emergencies down the road. Establishing proper daily habits and learning about optimal septic care will protect your new installation from early deterioration.
Sources: Septic shock
Frequently asked questions
How long does a septic replacement project typically take?
The entire septic replacement process, from initial site evaluation and permit approvals to final grading, usually takes between 2 and 6 weeks. However, the physical excavation and equipment installation phase generally takes only 2 to 5 days once permits are issued and machinery is on site.
Can I replace my septic tank myself to save money?
No, replacing a septic system yourself is unsafe and illegal in almost all jurisdictions. Proper installation requires heavy excavation machinery, civil engineering design compliance, precise pipe pitching, and mandatory municipal health inspections. Unlicensed installations cannot pass health department certification and will prevent property sales.
What is the average lifespan of a new septic system?
A properly engineered and professionally installed septic system lasts between 20 and 40 years. Maximizing system longevity depends on routine tank pumping every 3 to 5 years, practicing smart water conservation, and keeping heavy vehicles and structures off the drainfield.
Are there alternatives to a full septic replacement?
Yes, if the septic tank is sound and the soil issue is localized, alternatives like high-pressure drainfield jetting, soil fracture aeration, effluent filter installation, or replacing damaged distribution boxes can sometimes restore function without a full system overhaul.
How do I know if my drainfield needs replacing?
Key indicators of drainfield failure include standing water or sewage pooling over leach trenches, dark green soggy grass in dry weather, persistent indoor drain backups, and bad sewage smells around the lawn that persist after the septic tank is pumped.
What should I look for in a septic replacement warranty?
A comprehensive contractor warranty should cover both installation labor and material components (such as tanks, pumps, and distribution boxes) for 1 to 3 years. Ensure the warranty clearly states what service conditions apply and that the contractor handles permit final sign-offs.
Home Improvement
How to Clean Stone Countertops: Your Complete Guide to Lasting Luster
Learning how to clean stone countertops properly is essential for preserving their beauty and durability. This guide provides practical steps, expert tips, and product recommendations to maintain your surfaces.

To clean stone countertops safely, wipe them daily using a damp microfiber cloth with warm water and a few drops of pH-neutral dish soap or dedicated stone cleaner, then dry immediately with a clean towel. Avoid acidic liquids like vinegar or lemon juice, harsh chemicals, and abrasive pads, as these dissolve sealers and permanently etch calcium-based stone like marble and travertine.
Proper maintenance requires understanding your specific surface material, as granite, marble, engineered quartz, soapstone, and slate each react differently to moisture, acids, and friction. Below, learn how to identify your countertop material, select safe cleaning supplies, execute a daily cleaning routine, and remove stubborn stains using targeted poultices.
How to Clean Stone Countertops Safely and Remove Stains
To clean stone countertops safely, wipe daily using a damp microfiber cloth with warm water and a few drops of pH-neutral dish soap or dedicated stone cleaner, then dry immediately with a clean towel. Never use acidic liquids like vinegar or lemon juice, harsh chemicals, or abrasive pads, as these dissolve sealers and permanently etch calcium-based stone like marble and travertine.
Maintaining stone surfaces requires balancing routine hygiene with chemical awareness. While natural and engineered stone counters offer high durability and visual appeal, their underlying mineral compositions determine how they react to household spills and daily wear. A cleaning method that works well on sealed granite can dull polished marble or weaken the resin binders inside engineered quartz. Understanding the exact material of your countertop prevents costly surface damage and maintains its finish for years.
Identifying your stone type before applying any cleaner
The first step in learning how to clean stone countertops is determining whether your stone is silica-based, calcium-based, engineered, or mineral-soft. Each category responds differently to moisture, acids, and friction. (See bobvila.com for further reference.) Applying the wrong solution to a sensitive stone can lead to etching, staining, or surface discoloration within seconds.

Granite and quartzite
Granite and quartzite are silica-based natural stones formed under heat and pressure. They are hard, scratch-resistant, and relatively forgiving during routine cleaning. However, because they are naturally porous, unsealed granite and quartzite absorb liquids—particularly oils, grease, and dark dyes. They require pH-neutral cleaners and periodic application of an impregnating sealer to prevent subsurface staining.
Marble, limestone, and travertine
Marble, limestone, and travertine are calcareous natural stones composed primarily of calcium carbonate. This chemical structure makes them vulnerable to acids. Acidic substances like lemon juice, tomato sauce, coffee, vinegar, and wine react chemically with calcium carbonate, dissolving the upper layer of the stone. This chemical reaction creates dull, pale spots known as etching. Calcareous stones are also soft and porous, requiring gentle cleaning routines and frequent sealing.
Engineered quartz
Because resin fills every microscopic void, engineered quartz is non-porous and does not require sealing. It resists staining from common food liquids. However, the resins remain sensitive to high temperatures and harsh chemical solvents like paint strippers or concentrated degreasers.
Soapstone and slate
Soapstone consists mainly of talc and magnesite, making it non-porous and completely resistant to acidic corrosion. Liquids and acids cannot penetrate soapstone or cause chemical etching. However, soapstone is soft and prone to minor surface scratching. Maintenance involves applying food-safe mineral oil or specialized wax to deepen its dark color and conceal light surface scuffs rather than applying stone sealers. Slate is a dense, fine-grained stone with low porosity, though its layered structure requires non-abrasive tools to avoid flaking along natural fault lines.
What supplies and products do you need for stone countertop care?
Using improper cleaning equipment is a primary cause of accidental stone damage. Selecting non-abrasive tools and pH-balanced cleaning agents protects both the protective sealer and the stone surface itself.
Safe tools and cleaning products
- Microfiber cloths: Soft, split-fiber cloths capture dust, grease, and residual liquid without scratching stone or leaving lint.
- Non-abrasive cellulose sponges: Ideal for lifting stuck-on food bits when dampened with warm water.
- pH-neutral stone cleaners: Cleaning sprays formulated specifically for natural stone maintain a neutral pH of 7.0, cleaning grease without stripping sealers.
- Mild dish soap: Simple, additive-free liquid soap diluted in warm water provides safe daily cleaning. Avoid formulations containing citrus extracts or concentrated degreasers.
- Impregnating penetrating sealers: Solvent- or water-based sealers designed to absorb into porous natural stone without forming a plastic coating on top.
- Poultice powders and solvents: Plain baking soda, talcum powder, 3 percent hydrogen peroxide, and acetone for pulling set-in stains out of porous stone.
Products and ingredients that damage stone surfaces
- Acidic cleaners: White vinegar, cleaning vinegar, lemon juice, lime juice, and citrus-based sprays dissolve calcium carbonate on marble and break down granite sealers.
- Abrasive scrubbers: Scouring powders, heavy-duty green scrubbing pads, steel wool, and magic erasers act as fine sandpapers, scratching polished finishes.
- Harsh alkaline chemicals: Undiluted chlorine bleach, ammonia, oven cleaners, and drain uncloggers weaken resin binders in quartz and strip protective sealers from granite.
- Topical waxes and acrylic coatings: Wax layers build up over time, trapping dirt, yellowing under light, and creating a sticky surface film.
Daily routine for cleaning stone countertops
Establishing a daily cleaning habit prevents food residue, oils, and minerals from drying onto stone surfaces, eliminating the need for aggressive scrubbing or chemical treatments later.

- Clear loose debris: Remove cutting boards, small appliances, and trivets. Sweep crumbs and dry debris off the counter using a dry microfiber cloth to prevent grit from dragging across the finish.
- Prepare warm soapy water: Fill a sink or spray bottle with warm water and add a few drops of pH-neutral dish soap or dedicated stone cleaner.
- Wipe the surface: Dampen a clean microfiber cloth in the solution, wring out excess liquid, and wipe the entire countertop in overlapping circular motions.
- Rinse away soap film: Rinse the microfiber cloth under clean running tap water, wring it out, and wipe the countertop a second time to collect soap residue. Residual soap attracts dirt and leaves a dull film if left to dry.
- Dry thoroughly: Immediately buff the surface dry with a separate, dry microfiber towel. Drying prevents hard water minerals from leaving scale rings or streaky water spots.
How to treat stubborn stains on stone surfaces
When liquids penetrate unsealed stone or sit unattended, standard surface wiping may not remove them. Matching the correct cleaning agent to the stain type ensures effective removal without damaging the stone finish.
| Stain Type | Common Sources | Recommended Treatment | Application Notes |
|---|---|---|---|
| Oil-Based | Cooking oil, butter, grease, cosmetics, lard | Baking soda and acetone poultice paste | Covers stain under plastic wrap to draw oil up out of pores over 24 to 48 hours. |
| Organic | Coffee, tea, red wine, berries, food dye | Baking soda or flour with 3% hydrogen peroxide | Oxidizes organic color compounds; highly effective on light-colored natural stone. |
| Ink and Marker | Ballpoint pens, permanent markers, liquid ink | Acetone or isopropyl alcohol on a cotton ball | Dab gently on granite or quartz; avoid rubbing aggressively across marble. |
| Water Spots and Rings | Hard water mineral scale, standing glasses | Dry buffing with #0000 steel wool or stone polish | Buff very gently dry; never use acidic lime scale removers. Prevent by drying wet counters. |
| Rust | Cast iron pans, tin cans, metal dish racks | Non-acidic commercial stone rust remover | Apply stone-safe liquid rust treatments; avoid household rust formulas containing acid. |
Step-by-step instructions for mixing and applying a poultice
A poultice works through capillary action. A solvent dissolves the stain inside the micro-pores of the stone, while an absorbent powder draws the liquid upward into the paste as it dries.
- Prepare the powder base: Place two to three tablespoons of baking soda, flour, or diatomaceous earth into a glass bowl.
- Add the chemical liquid: For oil stains, add pure acetone until a thick paste forms. For organic food, coffee, or wine stains, add 3 percent hydrogen peroxide. Mix until it reaches the consistency of peanut butter.
- Pre-wet the stain: Moisten the stained area with a few drops of distilled water. Pre-wetting fills surrounding dry pores and prevents the dissolved stain from spreading outward.
- Apply the paste: Spread the poultice over the stain using a plastic putty knife, forming a layer roughly one-quarter inch thick that extends half an inch past the stain’s edges.
- Cover and seal: Cover the poultice completely with plastic cling wrap. Secure all four edges to the countertop using painter’s tape.
- Vent the plastic: Poke three or four small pinholes through the top of the plastic wrap using a toothpick. This allows air to enter slowly, driving gradual evaporation.
- Wait for drying: Leave the poultice undisturbed for 24 hours. Remove the plastic wrap and allow the paste to dry completely in open air for another 12 to 24 hours until it cracks into dry powder.
- Remove and rinse: Scrape away the dried powder using a flexible plastic scraper. Rinse the stone with warm water, wipe dry with a microfiber cloth, and assess the spot. Repeat the process if trace color remains.
How to test, seal, and protect natural stone countertops
Sealing natural stone does not make it waterproof or stain-proof, but it slows liquid absorption. An impregnating sealer fills microscopic channels within granite, marble, and quartzite, providing time to wipe up spills before stains set.

The water drop test for stone porosity
To check if your natural stone needs re-sealing, perform a simple water test:
- Pour a few drops of tap water onto clean, dry stone near the sink and prep areas.
- Let the water sit undisturbed for 10 to 15 minutes.
- Observe the stone. If the water beads up cleanly without absorbing, the sealer is functioning. If the water soaks in and leaves a dark wet spot on the stone, the sealer has degraded and requires re-application.
Choosing between impregnating sealers and topical sealers
Always select an impregnating sealer (fluoropolymer or silicone-based) for kitchen stone countertops. Impregnating sealers penetrate deep beneath the surface into microscopic pores, protecting the stone internally without altering its texture, breathability, or gloss. Avoid topical sealers or surface acrylic waxes; these create a film over the stone that can yellow, peel, and trap moisture beneath the surface.
Step-by-step process for sealing stone
- Deep clean the stone: Wipe the countertop thoroughly with a pH-neutral cleaner to remove all grease and film. Allow the stone to dry completely for 24 hours so trapped moisture does not interfere with sealer absorption.
- Apply sealer evenly: Pour or spray the impregnating sealer onto a small section of the countertop. Spread it evenly using a foam applicator pad or lint-free microfiber cloth so the stone surface remains visibly wet.
- Allow dwell time: Let the liquid dwell on the surface for 5 to 10 minutes (or according to product instructions) to allow absorption deep into the pores. If the stone absorbs the sealer instantly, apply a small amount more to keep the surface wet.
- Wipe off excess completely: Buff away all unabsorbed sealer using a clean, dry microfiber cloth before it dries on top of the stone. Leaving wet sealer to dry on the surface causes a tacky, hazy residue that requires solvent removal.
- Allow curing time: Let the sealer cure completely for 24 to 72 hours before placing heavy kitchen items or exposing the surface to oil and water.
What common cleaning mistakes destroy stone countertop finishes?
Many homeowners cause irreversible damage to stone counters while attempting routine cleaning. Avoiding these common mistakes preserves stone clarity and finish.
- Using vinegar, lemon juice, or glass cleaner: Acetic acid in vinegar and citric acid in citrus products chemically dissolve calcium carbonate, leaving permanent dull etch marks on marble, travertine, and limestone. On granite, acids strip away protective impregnating sealers over time.
- Scrubbing with abrasive pads: Green scouring pads, magic erasers, and abrasive kitchen powders scratch polished surfaces. Magic eraser foam consists of hard melamine resin that acts like ultra-fine sandpaper, wearing off high-gloss factory finishes.
- Leaving soap residue on surfaces: Dish soap contains fatty acids that build up into a sticky film when not rinsed thoroughly with clear water. This film catches dust, darkens light stone, and dulls natural light reflection.
- Placing hot pans directly on surfaces: While granite withstands high heat, rapid thermal expansion can cause hidden stress cracks. On engineered quartz, direct heat above 300°F (150°C) permanently discolors and scorches synthetic resin binders. Always use trivets under pots, slow cookers, and toaster ovens.
- Allowing water to collect near faucets: Standing water behind sinks evaporates and leaves hard mineral crusts (calcium and magnesium carbonate deposits). Trying to remove these deposits with acidic limescale removers damages surrounding stone.
How to repair etched, dull, or scratched stone countertops
Understanding the difference between an etch mark, a stain, and a scratch dictates the correct restoration strategy.
An etch mark is a physical surface burn caused by acid, resulting in a rough, dull spot where light reflects unevenly. A stain is dark discoloration beneath the stone surface caused by absorbed liquids. A scratch is a mechanical groove cut into the stone by hard metal or grit.
Restoring etch marks on polished marble
Light etch marks on polished marble or limestone can often be repaired without hiring a professional:
- Clean the etched area with plain water and dry thoroughly.
- Apply a small half-teaspoon amount of specialized marble polishing powder (containing aluminum oxide or tin oxide) directly over the etch mark.
- Dampen a clean microfiber cloth or felt pad with water and rub the powder over the mark using firm circular motions for two to three minutes.
- Wipe away the powder residue with a damp cloth and dry the surface to inspect the shine. Repeat the buffing process until the gloss matches the surrounding stone.
Addressing deep damage and quartz dullness
Severe etching across wide marble surfaces, deep scratches on granite, or resin scorch marks on engineered quartz cannot be buffed out using hand powders. These issues require professional stone restoration technicians who use wet diamond abrasive pads mounted on variable-speed rotary polishers to hone down damaged layers and re-polish the stone to its original sheen.
Practical cleaning solutions for real kitchen scenarios
Removing red wine or dark berry juice from marble
If dark liquid spills on marble, act immediately. Blot the spill firmly with a paper towel or microfiber cloth—never rub or wipe in broad strokes, which spreads dark liquid into neighboring stone pores. Spritz the spot with clean water, blot dry again, and inspect under light.
Cleaning heavy grease splatters from granite around cooktops
Oil splatters around stovetops sink quickly into granite pores if sealers are worn down. Spritz warm water mixed with a few drops of pH-neutral dish soap directly over the greasy splatter. Let the soap solution sit for three minutes to break down surface oils, scrub gently with a soft sponge, and wipe completely clean with a wet cloth. Dry with a towel. If dark oil shadows remain visible inside the granite after drying, apply a baking soda and acetone poultice paste to draw out the grease.
Eliminating hard water crust around kitchen faucets
Never apply standard bathroom scale removers or vinegar to mineral crusts on stone counters. Instead, soak a small cloth in pH-neutral stone cleaner, lay it directly over the mineral scale, and let it rest for 15 to 20 minutes to soften the crust. Gently lift and scrape away softened mineral deposits using a rigid plastic scraper or wooden spatula. Dry the area thoroughly with a microfiber cloth.
Sources: Countertop
Frequently asked questions
Can I use natural cleaners like vinegar on stone countertops?
No. Vinegar is acidic and will instantly etch calcium-based stones like marble, limestone, and travertine, leaving permanent dull spots. On granite and quartzite, vinegar breaks down protective sealers over time.
How often should I seal granite or marble countertops?
Most natural granite and marble countertops require re-sealing every 6 to 12 months, depending on stone density and daily usage. Perform a water drop test quarterly to verify whether your protective barrier remains intact.
What is etching and how can I fix it?
Etching is a chemical burn caused by acidic liquids dissolving the top layer of calcium-based stone, creating light, dull spots. Minor etching on polished marble can be buffed out with marble polishing powder, while severe etching requires professional diamond honing.
Are quartz countertops easier to clean than natural stone?
Yes. Engineered quartz is non-porous, meaning it resists stains without requiring sealers and tolerates daily cleaning with simple soap and water. However, quartz remains vulnerable to heat damage from hot pans and harsh chemical solvents.
What should I do if I spill something acidic on my marble countertop?
Blot the spill immediately with a clean, dry microfiber cloth without rubbing or spreading the liquid. Rinse the area with fresh water, wipe dry, and check for etching under direct light once the stone has dried.
Home Improvement
Septic System Installation Cost: What You Need to Know
Understanding the true cost to put in a septic system involves more than just the tank. From soil conditions to permits, many factors impact the final price. This guide breaks down what to expect for a new installation in 2026.
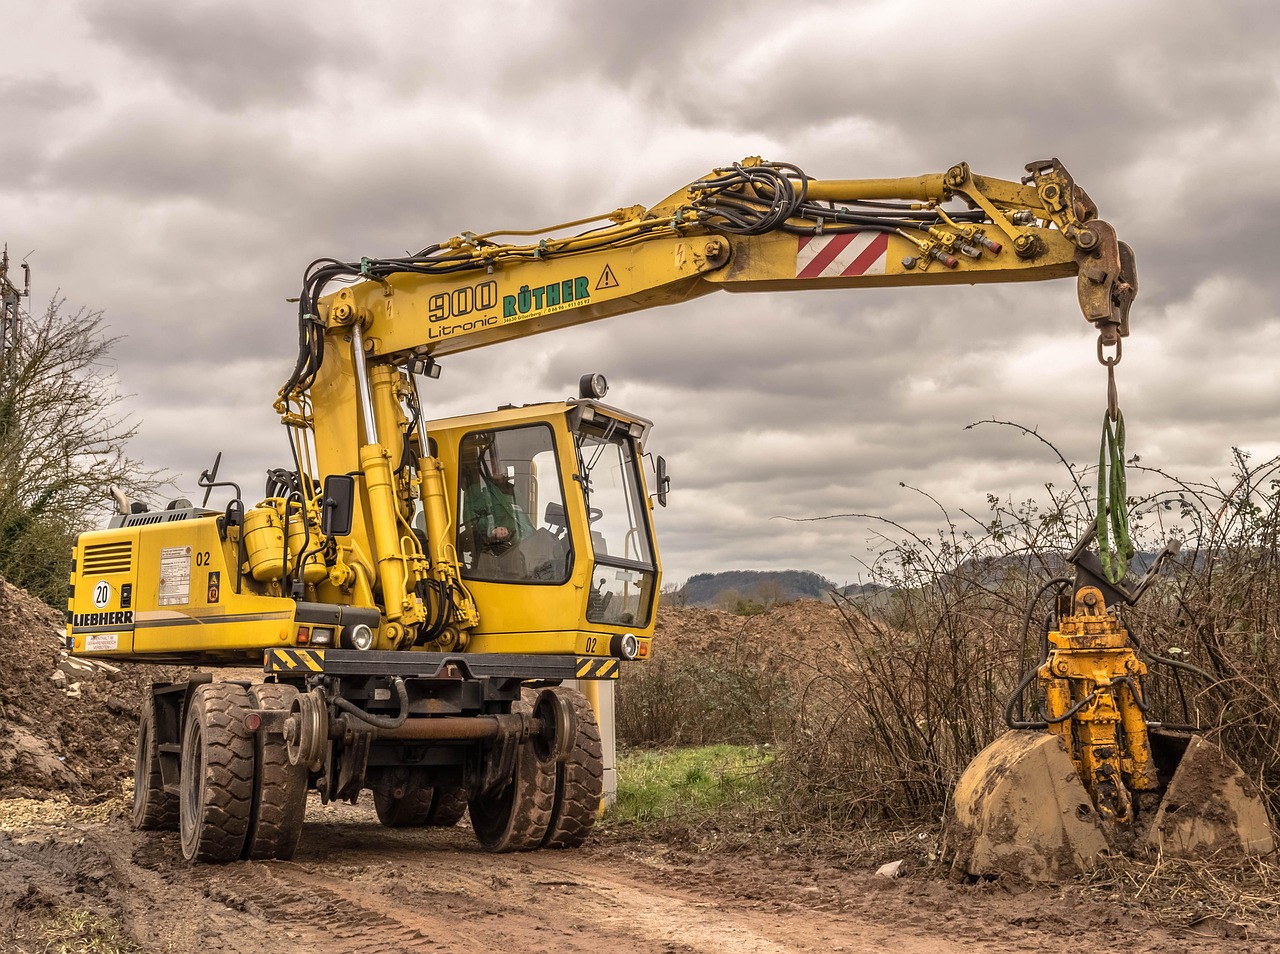
Installing a full septic system costs $10,000 to $25,000 for a conventional gravity system, while advanced systems like mound or aerobic treatment units range from $15,000 to $50,000 or more. The total price depends primarily on your soil percolation rate, system design, tank capacity, local permit regulations, and site excavation requirements.
A Year 7 teacher in rural Ohio once received vastly different quotes for a new septic system, ranging from under $10,000 to well over $30,000. That level of price variance happens because no two building sites share identical soil layers, bedrock depths, or groundwater levels. Detailed quotes and understanding hidden costs like landscaping repair can prevent budget overruns when installing or upgrading a home wastewater system.
How much does a septic system cost by system type?
The system design selected for your property dictates the largest share of your total budget. Site parameters like soil absorption speed, slope, and water table elevation determine which design local health officials will permit.
Conventional gravity-fed systems
A conventional gravity system costs between $10,000 and $25,000 to install. It uses gravity to move wastewater from the house into a septic tank, where solid matter settles to the bottom as sludge while lighter fats form a scum layer on top. The remaining liquid effluent flows by gravity into a distribution box, which routes it evenly through subterranean perforated pipes laid over aggregate gravel trenches. This option requires deep, permeable soil with rapid absorption capabilities, minimal terrain slope, and a low groundwater table. Because it lacks electrical mechanical pumps, ongoing operational costs remain low.
Mound systems for poor soil
Mound systems cost $15,000 to $35,000 due to extensive dirt hauling and engineered construction. When native soil sits over shallow bedrock, heavy clay, or a high water table, standard underground trenches cannot process effluent safely. Contractors build an elevated sand mound topped with aggregate rock and soil above natural ground level. An effluent pump inside a secondary dosing tank forces wastewater upward into the mound in measured doses. The sand bed filters pathogens before the liquid reaches native soil.
Aerobic treatment units (ATU)
An aerobic treatment unit costs $15,000 to $45,000. Operating like a scaled-down municipal sewage treatment facility, an ATU introduces oxygen into the primary treatment tank via an electric air pump. Aerobic bacteria break down organic waste faster and more completely than anaerobic bacteria, yielding much cleaner liquid effluent. ATUs are required for small residential lots, environmentally sensitive watersheds, or properties near surface waters. They consume electricity continuously and require biannual maintenance inspections.
Drip distribution systems
Drip distribution systems range from $20,000 to $50,000 or more. These advanced systems pump liquid effluent through narrow, pressurized drip lines installed 6 to 12 inches beneath topsoil across a wide area. Electronic dose timers release microscopic amounts of water directly into the upper soil root zone. Drip systems suit challenging sites with thin soil layers, steep slopes, or high water tables, but the complex valves, pumps, and extensive line networks make them the most expensive upfront option.
Pressure distribution and sand filter systems
Pressure distribution systems cost $12,000 to $28,000, adding a pump chamber to force liquid evenly into trenches across uneven terrain. Sand filter systems cost $15,000 to $35,000 and direct effluent through a specialized sand bed enclosure before sending it to a conventional drain field, adding secondary purification where soil depth is limited.
What core components drive the installation cost?
Every septic system relies on three primary physical stages: containment, conveyance, and dispersal. Understanding component pricing prevents surprises during line-item quote reviews.
The primary tank holds raw wastewater and initiates anaerobic digestion. Tank prices vary based on capacity, structural material, and manufacturing standards:
- Precast concrete tanks: Cost $1,200 to $4,000 installed. Concrete is extremely durable and heavy enough to resist flotation in high groundwater zones. However, heavy equipment is required to set concrete tanks into excavated holes.
- Polyethylene and plastic tanks: Cost $1,000 to $2,500 installed. Plastic tanks are lightweight, resistant to chemical corrosion, and easier to transport to remote building sites. They must be filled with water immediately after installation to prevent ground movement from dislodging empty tanks.
- Fiberglass tanks: Cost $1,500 to $3,500 installed. Fiberglass offers high structural rigidity, complete chemical resistance, and moderate weight, making it an excellent choice for soils with high moisture content.
Tank capacity is mandated by bedroom count rather than fixture count. Standard residential sizing requires 1,000 gallons for 1 to 3 bedrooms and 1,200 to 1,500 gallons for 4 to 5 bedrooms. Adding extra capacity costs $300 to $800 extra initially, but prevents overflow risks if household occupancy increases.
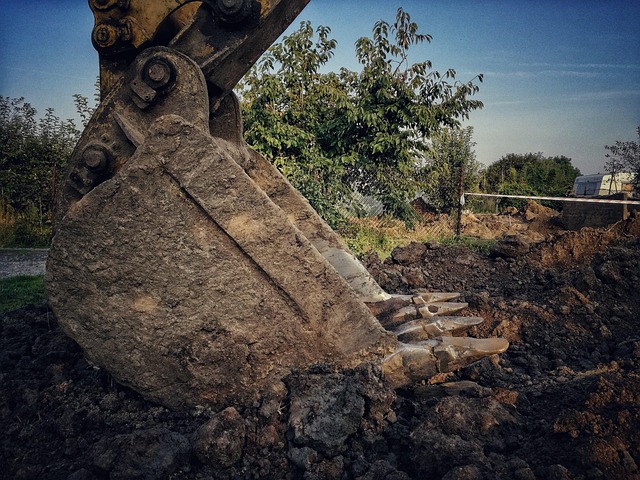
The drain field represents $5,000 to $15,000 or more of the project total. Traditional drain fields use washed stone aggregate and perforated corrugated pipe inside deep trenches. Modern alternatives use gravel-less plastic chamber panels, which reduce trench width and manual labor hours, though panel material costs are higher per foot.
How do soil conditions and perk tests dictate your price?
Your site’s natural soil profile dictates system engineering limits. Before digging, local health codes require a percolation test (perk test) and a deep test pit evaluation conducted by a certified soil scientist or sanitary engineer.
A perk test measures how fast water drains through native soil, recorded in minutes per inch (MPI):
- 15 to 45 MPI (Ideal draining soil): Sandy loam soils absorb wastewater at an optimal pace, allowing standard gravity drain fields with low excavation costs.
- Under 5 MPI (Excessively rapid drainage): Coarse sand or gravel lets liquid pass too quickly without adequate microbial filtering, risking groundwater pollution. Health departments require adding thick sand liners or engineered soil media.
- Over 60 MPI (Slow draining clay): Clay-heavy soil holds liquid, causing surface water pooling and backup. Conventional gravity fields fail in clay, forcing installation of mound or aerobic systems.
Excavator test pits also reveal seasonal water tables and bedrock depth. If solid rock or standing water sits within 2 to 4 feet of the surface, shallow trenching or elevated sand mounds become legally mandatory, increasing total installation expenses significantly.
What is the step-by-step installation process and fee breakdown?
Installing a complete septic system involves several distinct stages over three days to several weeks. Each stage contributes directly to the final invoice.
- Site Assessment and Engineering Design ($500 – $2,500): A licensed soil scientist performs perk testing and digs test pits. A civil engineer draws scaled plans specifying tank size, slope, pipe elevations, and drain field square footage.
- Permitting and Health Department Approvals ($100 – $1,500): Site plans are submitted to local health authorities for environmental review and permit issuance before construction begins.
- Excavation and Site Preparation ($2,000 – $10,000): Heavy excavators and bulldozers clear vegetation, remove topsoil, and dig deep trenches for the tank, distribution lines, and leach field. Soft soil or rocky ground increases machine hours.
- Septic Tank Setting and Main Plumbing Hookup ($1,500 – $5,000): Excavators lower the tank onto a compacted sand bed. Contractors run 4-inch PVC sewer lines from the house foundation to the tank inlet at a minimum slope of 1/4 inch per foot.
- Drain Field Construction ($5,000 – $15,000+): Workers assemble distribution boxes, lay aggregate stone or plastic chamber panels, run perforated piping, and install effluent pumps or control panels for advanced systems.
- Electrical Hookups ($500 – $2,000): For pumped, mound, or aerobic systems, an electrician wires dedicated circuit breakers, outdoor control boxes, and high-water alarm systems.
- Final Inspection and Site Backfilling: County health inspectors verify pipe pitch, tank depth, and component alignment before backfilling trenches with soil and grading the surface.
What regulatory rules and permit fees affect installation?
Septic permits are legally required to safeguard public health and protect regional drinking water aquifers. According to the U.S. Environmental Protection Agency (EPA) (2024), proper septic system design and installation are critical for preventing groundwater contamination. Permit costs range from $100 to $1,500 depending on county health fee schedules.
Municipalities enforce mandatory setback requirements specifying minimum horizontal distances between system components and surrounding features:
- Private water wells: Must sit 50 to 100 feet away from tanks and drain fields.
- Property lines: Require a 10 to 15 foot buffer zone.
- Home foundations and basements: Demand a 10 to 20 foot isolation distance.
- Surface waters (streams, lakes, ponds): Require 50 to 100 feet of separation.
In states like Ohio, the Ohio Department of Health sets strict statewide sewage treatment rules that require explicit site plans and post-installation operation permits, directly influencing total project timelines and engineering fees.
What hidden costs catch homeowners off guard?
Unexpected site obstacles can increase baseline estimates by thousands of dollars. Planning for these potential expenses prevents financial strain during construction.
- Subsurface rock encounters: Excavators that hit solid granite or shale require pneumatic rock hammers or specialized trenchers, adding $1,000 to $5,000 in labor and machinery fees.
- Tree clearing and stump extraction: Dense trees within 20 feet of the proposed drain field must be removed to prevent root invasion, costing $1,500 to $4,000.
- Utility line extension: Aerobic systems and pump vaults require 120V or 240V power lines run from the main home breaker panel to the yard, adding $500 to $2,000 in electrical contractor fees.
- Site dewatering: Digging in wet seasons or near high water tables requires continuous trash pumping to keep excavations dry while setting tanks, adding $500 to $1,500.
- Landscaping and site restoration: Tracked heavy equipment destroys grass, driveways, and garden beds. Budget $1,000 to $5,000 for topsoil restoration, grass seeding, or gravel driveway regrading after backfilling finishes.
How do septic system types compare in cost and performance?
Comparing system options highlights upfront investment alongside long-term operating costs and site compatibility.
| Septic System Type | Upfront Installation Cost | Annual Maintenance Cost | Best Use Case |
|---|---|---|---|
| Conventional Gravity | $10,000 – $25,000 | $100 – $300 (pumping every 3-5 years) | Deep permeable soil, flat terrain, low water table |
| Mound System | $15,000 – $35,000 | $200 – $500 (pumping, pump inspection) | Poorly draining clay, shallow bedrock, high water table |
| Aerobic Treatment Unit (ATU) | $15,000 – $45,000 | $300 – $800 (pumping, regular inspections, electricity) | Small lots, sensitive environments, poor soil |
| Drip Distribution | $20,000 – $50,000+ | $400 – $1,000+ (pumping, filter cleaning, pump/drip line inspection) | Uneven terrain, shallow soil, high water table |
When is a septic system not suitable for a property?
Installing a septic system is not feasible or legal for every piece of land. Recognizing these constraints early saves expensive engineering fees on unviable lots.
- Extreme urban density: Small residential lots under 0.25 acres rarely offer enough horizontal square footage to satisfy mandatory setback distances from wells, foundations, and property lines.
- Mandatory municipal sewer connection codes: Many municipalities mandate that if a public sewer main runs within 100 to 200 feet of a property line, homeowners must connect directly to city sewer rather than build a private septic system.
- Severe slope and landslide hazard zones: Slopes steeper than 25% create construction hazards and allow effluent to surface downhill before completing biological filtration.
- Unsubmerged bedrock at ground surface: Properties with exposed bedrock where topsoil depth is under 12 inches cannot anchor mound sand without heavy blasting, making installation financially impractical.
How can you lower costs without sacrificing code compliance?
While safety codes and engineering standards are non-negotiable, proactive planning helps keep overall project costs under control.
Obtain at least three itemized quotes from licensed, insured installers. Confirm that each quote lists tank specifications, excavation estimates, permit fees, and site backfilling responsibilities. For detailed strategies on selecting qualified contractors, read about vetting contractors.
Consider timing your project during dry weather windows in late summer or early autumn. Working in muddy or frozen ground increases equipment hours, machine wear, and labor costs. Homeowners can also clear brush, remove small saplings, and mark property lines before contractors arrive to lower site preparation fees.
How do you avoid common installation mistakes?
Skipping initial soil testing to save money upfront is a severe mistake. Installing a cheaper gravity system in slow-draining soil leads to premature drain field saturation, liquid sewage backing up into home plumbing, and costly full system replacement within a few years.
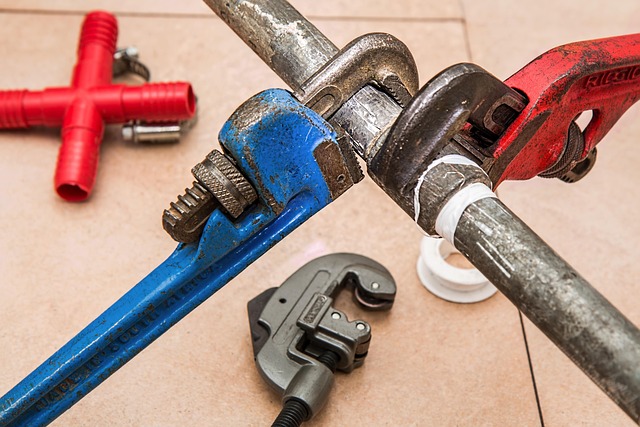
Another error is sizing the tank strictly for present needs without considering future home expansions. Adding an extra bedroom or bathroom later can overload a 1,000-gallon tank, forcing an expensive secondary tank addition. Also, driving heavy vehicles or parking machinery over the drain field crushes underground lines and compacts filter soil, destroying drain absorption capacity.
Sources: Emmell’s Septic Landfill Superfund site, Types of Septic Systems
Frequently asked questions
What factors most influence the cost of a new septic system?
Soil absorption capability and perc test results have the largest impact on total price. Poor soil, shallow bedrock, or high water tables force the installation of engineered mound, aerobic, or drip systems that cost significantly more than basic gravity units.
How much does a septic permit cost?
Septic permit fees generally range from $100 to $1,500 depending on county health department rates. This fee covers plan reviews by environmental health specialists and required site inspections during installation.
Is a conventional septic system always the cheapest option?
Yes, conventional gravity systems are the least expensive option when site conditions allow them. However, health codes will prohibit gravity systems if your soil drains poorly or bedrock sits near the surface.
What is a percolation test and why does it affect price?
A percolation test measures how fast water passes through native soil. Fast-draining soil permits compact gravity drain fields, while slow-draining clay requires expensive elevated sand mounds or mechanical aerobic treatment units.
How long does it take to install a new septic system?
Physical excavation and equipment installation usually take 3 to 7 working days once equipment is on site. However, obtaining perk tests, civil engineering designs, and health department permits often takes 3 to 8 weeks prior to digging.

Close Your Mind? Why It Actually Holds You Back

Richard Feynman’s Letter to His Wife: A Masterclass

Bird by Bird Anne Lamott: Lessons for Writing and Life

Nurturing Your Areca Palm Chrysalidocarpus: An Expert Guide

White Bird of Paradise: Mastering the Giant Indoor Plant

Beyond Inspiration: Life Is Too Short Quotes & Real Action
-
 Home & Living3 months ago
Nurturing Your Areca Palm Chrysalidocarpus: An Expert Guide
-
 Home & Living3 months ago
White Bird of Paradise: Mastering the Giant Indoor Plant
-
 Self-Improvement3 months ago
Beyond Inspiration: Life Is Too Short Quotes & Real Action
-
 Business & Growth3 months ago
Concrete Driveway Cost: Your Essential Budget Guide
-

 Business & Growth3 months ago
Drain Cleanout: Your Plumbing System’s Cost-Saving Secret
-

 Home & Living3 months ago
Jacaranda Tree: Cultivating Vibrant Purple Blooms in Your Landscape
-

 Business & Growth3 months ago
Strategic Home Additions: Maximizing Value and Seamless Integration
-

 Business & Growth3 months ago
Single Wide Manufactured Homes: A Smart Financial Choice?