
Business & Growth
Drain Cleanout: Your Plumbing System’s Cost-Saving Secret
A drain cleanout is more than just a pipe fitting; it’s your direct access point to the main sewer line, offering a strategic advantage for clearing clogs and maintaining your plumbing system’s health. Understanding its purpose and proper use can save homeowners significant time and money on costly repairs.


A drain cleanout is a dedicated pipe fitting with a removable threaded cap that provides direct, unobstructed access to your home’s main sewer line or branch drainage pipes for clearing stubborn clogs. Located outside near your foundation wall, in a basement, or under sinks, it allows plumbers or homeowners to insert augers and hydro-jetting equipment directly into the system without removing plumbing fixtures.
What is a drain cleanout and how does it work?
A drain cleanout acts as an emergency access portal and maintenance bypass for your drain-waste-vent system. When waste leaves your toilets, sinks, showers, and appliances, it flows through secondary branch lines into the main building drain, which transitions into the main sewer lateral leading to the municipal sewer line or septic tank. If an obstruction forms—whether from grease accumulation, toilet paper buildup, hair masses, or tree root intrusion—wastewater cannot pass, causing water to back up into the lowest fixtures in your home.
Attempting to clear a main sewer line blockage from an interior fixture like a toilet or sink drain is risky and inefficient. Indoor branch lines are typically 1.5 to 2 inches in diameter and feature tight 90-degree elbows that block heavy-duty drain cleaning cables. A main drain cleanout, by contrast, uses 3-inch or 4-inch piping with smooth sweeps, allowing full-sized cutter heads, motorized auger cables, and high-pressure jetting hoses to enter straight into the main sewer line. Knowing where your cleanout is located before an emergency occurs allows you to address main sewer blockages instantly, preventing raw sewage from backing up into bathtubs, floor drains, or finished living spaces. Adding or locating an accessible cleanout is a strategic utility upgrade that prevents catastrophic water damage and expensive property remediation.
Where is your main drain cleanout located?
Finding your main cleanout can take a bit of searching depending on when your home was built, local plumbing codes, and whether your home is built on a basement, crawlspace, or concrete slab foundation.
Finding outdoor main cleanouts
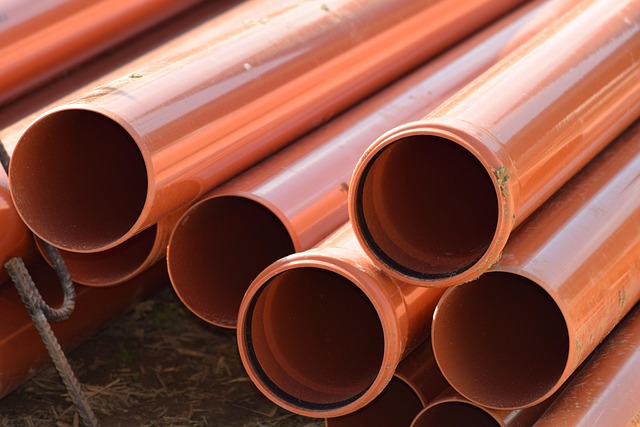
In modern home construction and warmer climates, the main sewer cleanout is almost always located outdoors. Look near the exterior foundation wall close to the bathroom or kitchen side of the house. Outdoor cleanouts feature a 3-inch or 4-inch plastic or cast-iron pipe sticking up a few inches above ground level with a threaded square-head cap or a flush brass plug set in a concrete collar or plastic box.
In many jurisdictions, builders install a double cleanout in the front or side yard, consisting of two riser pipes spaced roughly 12 to 24 inches apart. One pipe sweeps back toward the home to clear house-side blockages, while the other sweeps outward toward the street or septic tank. If your cleanout cap is installed flush with the lawn, it may be hidden beneath turf, mulch, gravel, or decorative landscaping.
Finding indoor and secondary cleanouts
In colder regions or older homes built on basements and crawlspaces, the main drain cleanout is often located indoors to protect it from freezing temperatures:
- Basement floor or wall: Look near the front or rear basement wall where the main stack drops down into the concrete floor. The cleanout plug is usually threaded directly into the cast-iron or PVC main drain tee near floor level or flush with the floor slab.
- Crawlspace: Look along the main drain pipe running toward the exterior wall. It will have a Y-fitting with a threaded cap pointing along the direction of flow.
- Garage or utility room: In slab-on-grade homes, cleanouts are frequently located inside a recessed wall access box, in a utility closet, or embedded in the garage floor slab.
Secondary cleanouts are smaller (1.5 inches to 2 inches) and serve individual branch lines. You will typically find them underneath kitchen or bathroom sinks, behind washing machine wall boxes, or near exposed sink drain traps in utility areas.
How to uncover a buried cleanout cap
If your outdoor cleanout was buried during landscaping or grading, you can locate it using a few simple methods:
- Locate your main sewer line path: Find where the main waste stack exits your basement or crawlspace wall. The outdoor cleanout will align directly with this pipe path outside the foundation wall.
- Use a metal probe rod: Gently push a thin steel probe rod into the soil in 6-inch increments along the suspected pipe path, feeling for a hard plastic, brass, or cast-iron cap buried 2 to 12 inches below the surface.
- Use a metal detector: If your cleanout has a brass plug or iron rim box, a standard metal detector can pinpoint its precise location underground.
- Check your municipal property plot or plumbing map: Local building departments often keep plumbing record drawings showing exact outdoor cleanout locations relative to foundation walls or curb lines.
Types of drain cleanouts and pipe configurations
Plumbing systems utilize specific cleanout configurations based on location, pipe material, and access requirements. Understanding which type of cleanout you have ensures you select the correct tools and opening procedures.
Single-way vs. double-way cleanouts
A single-way cleanout features a single riser pipe connected to a single-directional sweep (Y-fitting). The sweep directs drain cleaning cables down toward the street or septic tank. To snake back toward the house, you must manually guide the cable back up the flow direction, which can be difficult through a single fitting.
A double-way cleanout (also called a U-cleanout or double-sweep cleanout) consists of two side-by-side riser pipes connected to a double-directional sweep fitting in the main line. Opening the pipe closest to the house allows you to snake backward toward interior fixtures, while opening the street-side pipe provides a straight line into the sewer lateral. Proper main sewer line access is critical for preventing hazardous waste overflows and protecting structural plumbing integrity.
Main line vs. secondary branch cleanouts
Main line cleanouts are constructed from 3-inch or 4-inch piping (and up to 6 inches for large multi-family properties). They handle the full volume of waste from every plumbing fixture in the home.
Secondary branch cleanouts are 1.5-inch or 2-inch fittings designed to service specific fixture runs, such as a kitchen island sink line or a laundry standpipe. Clearing a secondary cleanout targets localized grease or lint blockages without opening the main building drain. For additional guidance on secondary line maintenance, see Stop the Drain: Identifying and Eliminating Waste for Money.
Cleanout plug materials and cap styles
Cleanout caps are designed to create an airtight and watertight seal to prevent sewer gases and wastewater leaks:
- PVC and ABS caps: Lightweight plastic caps with a raised square nut or recessed countersunk square socket. They thread into plastic cleanout adapters easily and resist corrosion.
- Cast iron and brass plugs: Common in older homes. Heavy brass threaded plugs fit into cast-iron cleanout bodies. Over time, corrosion between brass and iron can lock these threads in place.
- Mechanical expansion plugs: Rubber plugs with a central wing nut or hex bolt. When tightened, the rubber expands outward against the pipe walls to form an airtight seal. These are commonly used as replacements when original threaded pipe caps become stripped or corroded.
Signs you have a main sewer line clog that requires cleanout access
Recognizing the difference between a simple fixture clog and a main sewer line blockage determines whether you should clear a sink trap or open your main drain cleanout. A main sewer blockage affects multiple drainage points throughout the home simultaneously.
Common indicators of a main line blockage include:
- Multiple fixture backups: Running water down the kitchen sink causes water to rise in the lowest shower drain. Flushing a main floor toilet causes wastewater to surge into a basement bathtub or floor drain.
- Gurgling fixtures: Toilets, sinks, or tub drains make distinct bubbling or gurgling sounds when other appliances run. For example, when your clothes washer drains its spin-cycle wastewater, air trapped behind a main line obstruction forces its way up through nearby toilet traps.
- Standing water or waste around outdoor cleanout: If sewage or foul-smelling water is leaking around your outdoor cleanout cap or pooling on the grass around the riser, the sewer lateral is completely blocked and pressurized.
- Foul sewer gas odors: Persistent sewage smells inside your basement or near an outdoor cleanout indicate standing wastewater backed up inside the main pipe stack or a cracked, loose cleanout cap allowing sewer gases to escape.
Step-by-step guide to opening and clearing a drain cleanout safely
Clearing a main line blockage through a drain cleanout can save hundreds of dollars compared to an emergency service call, but it requires strict safety protocols to handle raw sewage and line pressure safely.

Essential tools and safety gear
Before attempting to open a cleanout, gather these tools and protective items:
- Heavy-duty waterproof rubber work gloves
- Safety goggles or face shield
- Pipe wrench or large channel-lock pliers
- Flathead screwdriver or chisel (for stubborn caps)
- 5-gallon bucket and old rags or towels
- Tarps or plastic sheeting to cover surrounding areas
- Electric drum auger (drain snake) with 50 to 100 feet of 1/2-inch or 5/8-inch cable and interchangeable cutting heads
- Teflon tape or thread sealant (pipe dope) for reinstalling caps
Opening the cleanout plug without causing a flood
If wastewater is backed up inside your home, the vertical pipe stack behind the cleanout cap may be filled with several gallons of pressurized sewage. Opening the cap quickly can cause a sudden surge of contaminated water.
- Stop all water use: Turn off all faucets, laundry machines, and dishwashers. Advise everyone in the home not to flush toilets or run water.
- Protect the surrounding area: Lay down tarps around the cleanout base and position a 5-gallon bucket directly underneath the plug.
- Loosen the plug slowly: Fit your pipe wrench onto the square nut of the cleanout plug. Turn it counter-clockwise very slowly. Do not remove the plug entirely on the first turn.
- Relieve built-up head pressure: Allow any trapped wastewater or air pressure to trickle out slowly into your bucket. If sewage surges rapidly around the threads, tighten the plug back down slightly to control the flow. Let the water drain out gradually until the stream stops.
- Remove the cap completely: Once pressure is relieved and water ceases to flow, carefully unscrew and remove the cap completely. Inspect the pipe opening for visible debris.
Snaking the line through the cleanout
- Select the correct auger cutter head: Attach a spear-head or bulb auger tip for general paper and grease clogs, or a C-cutter drop-head for hair and small roots.
- Insert the auger cable: Manually feed the end of the auger cable into the cleanout fitting in the direction of the clog (downstream toward the sewer main or upstream toward the home).
- Advance the cable: Feed the cable by hand until you encounter firm resistance. Do not force the cable blindly; push steadily while rotating the drum.
- Engage the auger motor: Turn on the motorized auger (or crank the manual handle clockwise) to rotate the cable head against the obstruction. Advance the cable slowly, allowing the rotating cutter head to chew through grease, paper masses, or small root masses.
- Break up and retrieve the obstruction: Move the cable back and forth several inches while rotating to chew through the blockage completely. Retrieve the cable periodically to clear bound hair, grease, or roots from the cutter head.
- Flush the system: Once the cable passes through the clog and moves freely, pull the auger cable back out completely. Pour several buckets of clean water down the cleanout or run a nearby garden hose to flush loosened debris down the sewer main.
- Reseal the cleanout cap: Clean the threads on both the pipe fitting and the cleanout cap. Apply fresh Teflon tape or pipe dope to male threads, screw the plug back into place, and tighten firmly with a pipe wrench to prevent leaks and sewer gas entry.
When to call a professional plumber for cleanout service
While minor grease and toilet paper clogs can be cleared with a rental auger, severe or recurring sewer main problems require professional diagnostic equipment and specialized machinery.
Hydro-jetting main sewer lines
When pipes suffer from thick grease accumulation, heavy scale buildup, or dense tree root intrusion, standard mechanical snakes only punch a narrow hole through the center of the clog. Hydro-jetting uses high-pressure water streams (ranging from 3,000 to 4,000 PSI at 6 to 12 gallons per minute) propelled through a specialized nozzle attached to a flexible hose inserted into the cleanout.
The forward water jet breaks through solid obstructions, while backward-facing water jets scour the internal pipe walls, washing away all residual grease, heavy sludge, scale, and root fibers. Hydro-jetting restores the full interior pipe diameter, providing a thorough cleaning that mechanical snaking cannot match.
Sewer camera video inspections
Professional plumbers perform sewer line inspections by inserting high-resolution waterproof camera heads mounted on flexible push rods into your cleanout. Using specialized sewer camera inspection tools, plumbers can view real-time video footage of your pipe interior on an external monitor.
Camera inspections locate exact pipe defects, including:
- Dense tree root penetrations through pipe joints
- Offset, separated, or cracked clay or cast-iron pipe sections
- Pipe bellies (low points in the pipe line where water and sediment pool)
- Collapsed, crushed, or corroded pipe walls requiring structural trenchless pipe lining or excavation repair
Installing a cleanout if your home lacks one
If your home was built without an accessible main cleanout, clearing sewer main blockages requires removing toilets or cutting into main pipe stacks. Professional plumbers can install a dedicated exterior main cleanout by excavating down to the main sewer lateral, cutting out a section of pipe, and splicing in a PVC double-sweep cleanout assembly with vertical riser pipes terminating at ground level.
DIY vs. professional drain cleanout service
Comparing self-service cleanout clearing with hiring a licensed plumbing contractor helps you weigh immediate tool expenses against long-term safety and thoroughness.
| Feature | DIY Drain Cleanout | Professional Cleanout Service |
|---|---|---|
| Equipment & Method | Hand auger or electric rental snake (50–100 ft cable) | Heavy-duty motorized auger, commercial hydro-jetter, video camera |
| Typical Cost Range | $30 – $200 (rental or tool purchase) | $200 – $600 (snaking) / $400 – $1,000+ (hydro-jetting & video camera) |
| Clog Removal Capability | Effective for paper, hair, and soft grease; limited for roots | Complete removal of all clogs, root masses, grease walls, and scale |
| Diagnostic Capabilities | None (blind insertion of cable) | Full video camera diagnostic pinpointing pipe cracks, sags, and offsets |
| Risk of Pipe Damage | Moderate to High (improper cable rotation can crack brittle pipe) | Low (trained operators select correct head and pressure settings) |
| Required Time & Effort | 1 to 3 hours of physical labor | 1 to 2 hours of technician service |
| Warranty & Service Guarantee | None | Most contractors offer 30-day to 1-year drain clearance warranties |
Common drain cleanout mistakes to avoid
Homeowners frequently make critical errors when accessing or maintaining their drain cleanout fittings, leading to pipe repairs or health hazards:

- Pouring harsh chemical drain openers into the cleanout: Chemical drain cleaners containing sodium hydroxide or sulfuric acid generate high heat that can warp thin plastic pipes or crack older cast iron. Also, if the chemical fails to dissolve the clog, the pipe stack remains filled with corrosive acid. When you subsequently unscrew the cleanout plug, hazardous chemicals can splash onto your skin and eyes, creating extreme danger for anyone working on the line.
- Forcing an auger cable past hard obstructions: Forcing a spinning auger cable against solid tree roots or an offset pipe joint can cause the cable to kink, snap off inside the pipe, or burst straight through cracked clay or iron pipe walls. Always rotate and advance cables gradually.
- Leaving the cleanout plug loose or missing: Missing or improperly sealed cleanout caps permit dangerous sewer gases (including hydrogen sulfide and methane) to enter your yard or home. Loose caps also allow outdoor stormwater debris, rocks, leaves, and rodents to fall straight into your sewer line, creating severe blockages.
- Overtightening cast iron or plastic plugs: Over-torquing threaded plugs can strip plastic threads or freeze metal-to-metal fittings, making future removal impossible without cutting or drilling out the plug. Use Teflon tape on threads and tighten plugs firmly hand-tight plus one-quarter turn with a wrench.
Preventative maintenance for long-term drain health
Keeping your drain cleanouts and sewer lines clear requires consistent habits that prevent debris build-up before blockages form:
- Schedule regular bio-enzyme treatments: Maintain clean pipes by flushing organic bio-enzyme drain cleaners down your fixtures monthly. Unlike harsh caustic chemicals, bio-enzymes digest organic grease, soap scum, and hair without harming PVC, ABS, or cast-iron piping.
- Apply foaming root killer through outdoor cleanouts: If your property has mature trees near the sewer lateral path, pour an EPA-approved foaming root inhibitor directly into your outdoor cleanout once or twice a year. The foam expands to fill the pipe cavity, killing root tips on contact without harming trees or damaging pipes.
- Never dispose of grease or wipes down drains: Cooking fats, oils, and grease solidifies inside cool underground pipes, creating dense grease caps. Always scrape fats into solid trash bins. Never flush “flushable” wipes, paper towels, facial tissues, or hygiene products, as synthetic fibers do not break down in water and rapidly bind with grease in sewer lines.
- Inspect cleanout caps annually: Check outdoor cleanout caps every spring and autumn. Replace cracked plastic caps, corroded brass plugs, or missing covers immediately to ensure your sewer system remains tight and pest-free.
Sources: CCTV drain camera (plumbing)
Frequently asked questions
How often should a drain cleanout be inspected or serviced?
For most homes, a drain cleanout inspection every 1 to 3 years is a sound preventative measure. If you experience frequent clogs, live in an older home, or have mature trees near your sewer line, annual video camera inspections are recommended to catch root intrusion early.
Can I pour chemical drain cleaner down my drain cleanout?
It is strongly advised against pouring chemical drain cleaners down your drain cleanout. Harsh chemicals can corrode cast iron or warp PVC pipes, and if they fail to clear the clog, they trap standing acid behind the plug that poses a severe chemical burn risk when opened.
What should I do if water is overflowing from my outdoor cleanout?
An overflowing outdoor cleanout indicates a total main sewer line blockage downstream toward the street or septic tank. Immediately stop using all water and running appliances in your home, and contact a professional plumber to clear the line with a motorized auger or hydro-jetter.
What is the difference between a drain cleanout and a floor drain?
A drain cleanout is a sealed access port designed specifically for inserting cleaning cables directly into waste lines. A floor drain, found in basements or utility rooms, is an open drain grate designed to collect standing water from floor spills or appliance leaks.
How much does it cost to clear or install a main drain cleanout?
Clearing a main cleanout professionally ranges from $200 to $600 for standard snaking, while hydro-jetting and camera inspections range from $400 to $1,000 or more. Installing a new outdoor main cleanout from scratch typically costs between $1,500 and $3,500 depending on depth and excavation requirements.











Business & Growth
Roof Replacement Cost: An Expert’s Financial Breakdown
Understanding the true roof replacement cost is crucial for any homeowner. This guide breaks down average prices, material variations, labor expenses, and hidden factors for 2026, empowering you to make informed financial decisions for your home.
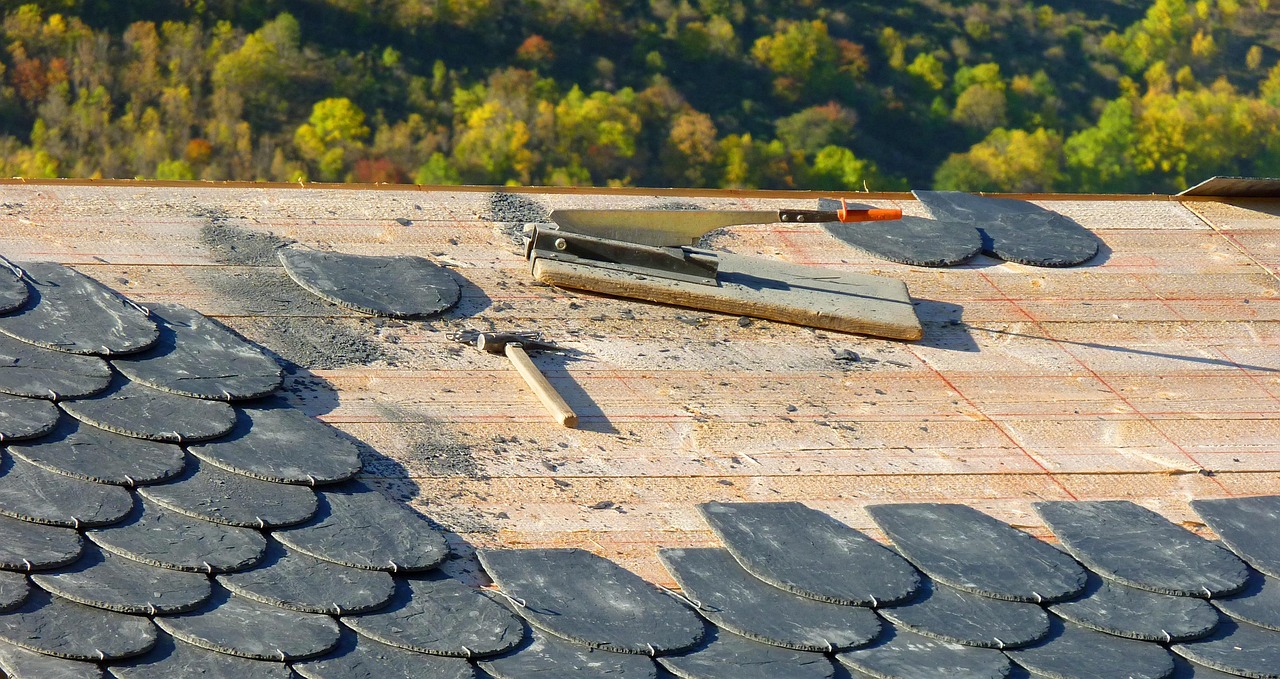
A typical residential roof replacement cost ranges between $8,000 and $18,000 for a standard home, with an average overall cost of about $10,000 for a 1,700-square-foot asphalt shingle installation. Final pricing depends primarily on your roof’s square footage, slope pitch, material choice, and local labor rates in your market.
Replacing a roof is one of the largest structural maintenance expenses you will face as a homeowner. While a basic asphalt shingle tear-off on a simple single-story home can stay under $8,000, multi-story structures with steep slopes, intricate designs, or premium materials like standing seam metal, clay tile, or natural slate easily reach $25,000 to $45,000 or more.
How roof size and surface area affect your total cost
Roofers do not measure a job strictly by the interior square footage of your home. Instead, roofing contractors estimate projects using a measurement unit called a roofing square. One roofing square equals 100 square feet of roof surface area. A 2,000-square-foot single-story home typically has a larger roof surface than 2,000 square feet due to roof overhangs, eaves, and pitch multipliers.
To calculate actual roof surface area, contractors multiply the footprint of your home by a factor determined by roof slope. Here is how estimated total costs scale across common residential roof sizes for basic architectural asphalt shingles:
- 1,000 sq ft roof (10 squares): $3,500 to $6,000 total installed cost.
- 1,500 sq ft roof (15 squares): $5,250 to $9,000 total installed cost.
- 1,700 sq ft roof (17 squares): $6,000 to $9,000 average installed cost.
- 2,000 sq ft roof (20 squares): $7,000 to $12,000 total installed cost.
- 2,500 sq ft roof (25 squares): $8,750 to $15,000 total installed cost.
- 3,000 sq ft roof (30 squares): $10,500 to $18,000 total installed cost.
Comparing roofing material options and installed pricing
The material you choose is the single largest variable in your total project balance. Standard asphalt shingles remain the most common choice due to affordability and ease of installation, but metal, tile, wood, and slate offer significantly longer lifespans at higher upfront price points.
| Roofing Material | Installed Cost per Sq Ft | Expected Lifespan | Best Suited For |
|---|---|---|---|
Asphalt shingles
Asphalt shingles come in three main varieties: traditional 3-tab, architectural (laminated), and high-end designer. Basic 3-tab shingles are lightweight and inexpensive ($3.50 to $5.00 per square foot installed), but they offer less wind resistance and a shorter operational life. Architectural shingles cost $4.50 to $7.00 per square foot installed; they are thicker, handle higher winds, and create a multi-dimensional shadow line that enhances curb appeal. Designer shingles mimic tile or slate and range from $7.00 to $11.00 per square foot.
Metal roofing
Metal options range from exposed-fastener corrugated steel panels to concealed-fastener standing seam systems and stamped metal shingles. Corrugated panels sit at the lower end of metal pricing ($8.00 to $11.00 per square foot installed), while premium standing seam metal systems cost $12.00 to $18.00 per square foot installed. Metal roofs reflect thermal radiation, reducing summer cooling costs, and hold up exceptionally well under heavy snow loads.
Tile roofing
Concrete tiles are more affordable than traditional clay tiles ($10.00 to $18.00 per square foot installed versus $15.00 to $25.00 per square foot for clay). Both materials excel in severe warmth and dry climates, standing up to harsh sun and salt air. However, tile is extremely heavy, weighing between 600 and 1,100 pounds per square. Homes shifting from lightweight asphalt to tile usually require structural framing checks and potential rafter reinforcement before installation.
Wood shakes and slate
Cedar shingles and split shakes provide natural insulation and a classic appearance at $7.00 to $15.00 per square foot installed. They demand routine treatment to resist rot and insects, and local building fire codes may mandate fire-retardant treatments or ban them in wildland-urban interface zones. Natural slate is the longest-lasting material available, frequently outlasting the building framing itself, but commands $15.00 to $40.00 or more per square foot due to specialized stone-masonry labor requirements.
Breakdown of labor and structural tear-off expenses
A typical roofing crew of four to six workers takes one to three days to complete a standard replacement.

Old roof removal and disposal
Stripping an old roof down to the wooden deck costs $1.00 to $5.00 per square foot. If your roof has multiple existing shingle layers—a practice previously permitted by building codes—removal costs increase by $1.00 to $2.00 per square foot for each extra layer stripped. Tearing off old materials includes manual labor, chute rental, dumpster fees, and local landfill tipping charges.
Underlayment, drip edges, and flashing
Once the old material is removed, installers lay down synthetic underlayment or felt paper to form a moisture barrier ($0.50 to $1.50 per square foot). In cold regions, installers place self-adhering rubberized membrane (ice and water shield) along the eaves, valleys, and around chimneys to prevent water damage from ice dams. Metal drip edges are installed along roof perimeters, and new aluminum or copper flashing is cut and fitted around sidewalls, dormers, and vent stacks.
Decking repairs and structural plywood replacement
If the wooden roof deck beneath the shingles has suffered water damage or rot, compromised plywood or OSB sheets must be replaced. Roofers typically charge $75 to $120 per 4×8 sheet of plywood replacement, including labor and materials. Until the original shingles are peeled back, contractors cannot guarantee the exact condition of the underlying deck, making framing repairs one of the most common mid-project expense additions.
How pitch, height, and structural design change labor pricing
Roof slope and physical height alter how quickly and safely a roofing crew can operate. Steep slopes slow down production because workers must wear safety harnesses, tie off to anchors, and set up scaffolding or specialized staging equipment.

Roof pitch is written as a ratio of vertical rise over 12 inches of horizontal run:
- Low slope (1/12 to 3/12): Requires specialized membrane materials (such as TPO or EPDM) to prevent standing water leaks.
- Standard walkable pitch (4/12 to 6/12): Crews can walk without anchor harnesses, keeping labor rates standard.
- Steep pitch (7/12 to 9/12): Adds 15% to 30% to total labor charges due to restricted mobility and mandatory safety gear.
- Severe pitch (10/12 to 12/12 and above): Can add 35% to 50% or more to labor charges, requiring continuous staging and harness rigging.
Architectural layout affects pricing similarly. A basic dual-sloped gable roof features long continuous surfaces that workers can shingle rapidly with low waste. A complex hip roof with multiple dormers, valley intersections, skylights, and high chimneys requires meticulous hand-cutting and flashing installation.
Hidden expenses to anticipate before work begins
- Permits and municipal inspections: Local city or county building permits range from $150 to $1,000 depending on total project valuation and regional fee tables.
- Skylight replacement or flashing: Old skylight seals often fail when surrounding shingles are disturbed. Re-flashing an existing skylight costs $200 to $400, while replacing a unit entirely during roof replacement costs $800 to $1,800.
- Chimney masonry work: Replacing rotted lead or aluminum chimney step-flashing costs $300 to $700. If the chimney brick requires masonry tuckpointing, repairs can run an extra $500 to $1,500.
- Gutter and downspout replacement: Stripping a roof can damage old or compromised gutters. Installing smooth aluminum gutters simultaneously runs $6 to $14 per linear foot ($1,200 to $2,800 for an average home).
- Attic ventilation improvements: Standard building codes require adequate balanced intake and exhaust ventilation (1 square foot of net free vent area per 300 square feet of attic floor). Adding ridge vents or soffit vents runs $300 to $1,200.
Should you repair or replace your existing roof?
Choosing between spot repairs and full replacement depends on roof age, overall material condition, and the total square footage of existing damage.
When to choose repair
If your roof is under 15 years old and experiencing localized damage—such as a couple of missing shingles after a wind storm, minor flashing uplift around a pipe boot, or localized hail damage—a targeted repair is normally sufficient. Spot repairs typically cost between $300 and $1,200. Repairing makes financial sense when the surrounding shingles remain flexible, hold granular coating, and lie flat.
When to choose full replacement
A full replacement is recommended when your asphalt shingle roof reaches 18 to 20 years of age, or when signs of widespread deck fatigue appear. Indicators including curled shingle edges, bald spots with extensive granule buildup in gutters, soft wooden decking spots underfoot, or interior ceiling stains across multiple rooms indicate systemic system failure. Repeated patch repairs on an aging roof lead to compounding costs without resetting warranty coverage.
Repair versus replacement trade-offs
- Repair Pros: Low immediate out-of-pocket cost, fast turnaround (often a few hours), preserves existing roof material where intact.
- Repair Cons: Mismatched shingle colors due to fading from weather exposure, failure to address hidden rot beneath underlayment, lacks new long-term installer warranties.
- Replacement Pros: Resets entire waterproofing envelope, improves overall energy efficiency, raises property resale appeal, provides comprehensive manufacturer material warranties (25 to 50 years).
- Replacement Cons: Requires substantial capital outlay, creates several days of construction noise and debris.
Financing options to pay for a new roof
Because unexpected roof leaks demand quick resolution, home improvement funding paths are frequently utilized by property owners needing structured repayment options.

- Home Equity Line of Credit (HELOC) or Home Equity Loan: Secured by your property equity, these loans generally offer lower interest rates than credit cards or personal loans. They provide structured terms but carry risk if payments fall behind. Balancing home upgrades within your structured monthly budget helps keep overall debt low; reviewing a practical framework for home renovation savings ensures capital is available before emergency repairs arise.
- Personal loans: Fixed-rate unsecured personal loans do not put your home up as collateral and approve quickly, though interest rates sit higher based on your personal credit score.
- Contractor financing programs: Many large roofing companies partner with third-party lenders to offer promotional zero-interest or deferred-interest plans for 12 to 24 months. Ensure you verify default interest penalties before signing.
- FHA Title I Property Improvement Loans: Government-backed loans offered through approved lenders designed specifically for essential residential structural upkeep, with loan terms up to 20 years.
- Insurance claims: If your roof failure stems from a sudden covered event—such as direct storm hail, severe wind shear, or fallen tree limbs—your homeowners insurance policy may cover the total replacement cost minus your policy deductible. Standard aging, wear and tear, or neglected upkeep are not covered by insurance.
What happens during a roof replacement project?
Knowing the operational sequence helps you verify that your chosen roofing team executes proper waterproofing standards from start to finish.

- Contract review and permitting: You sign a scope of work specifying shingle style, warranty parameters, component brands, and payment milestones. The contractor pulls necessary municipal permits.
- Property protection setup: On install day, the crew places plywood shields over air conditioning compressors and hangs tarps from eave lines down to protect landscaping, decks, and windows from falling debris.
- Tear-off and deck evaluation: Installers scrape away old shingles and underlayment down to bare wood. The crew replaces water-damaged decking sheets with fresh OSB or plywood.
- Drip edge and leak barrier installation: Metal drip edge is fastened along lower roof edges. Heavy self-adhering ice and water membrane goes down along eaves, valleys, and wall joins.
- Underlayment and shingle installation: Synthetic underlayment rolls across the entire roof surface. The crew nails down starter shingle strips at perimeter edges, followed by rows of primary shingles using galvanized roofing nails driven to exact depth.
- Flashing, pipe boots, and ridge vents: Installers weave flashing around chimneys and walls, replace rubber pipe boots over plumbing vents, and cut open apex ridge slots to install continuous attic ventilation caps.
- Debris cleanup and final inspection: The crew clears the yard, runs magnetic sweepers across lawn areas and driveways to catch fallen nails, and schedules the municipal building inspector for final clearance.
Costly mistakes to avoid when replacing your roof
Prevent expensive callbacks, voided warranties, and structural premature failure by steering clear of these common pitfalls:
- Choosing the lowest quote automatically: Outlier bids that undercut standard market rates often rely on unbonded casual labor, missing workers’ compensation coverage, or low-tier materials lacking proper manufacturer warranties. Always demand proof of general liability insurance ($1,000,000 minimum) and active local licensing.
- Installing new shingles over an old layer: Overlaying new asphalt shingles over damaged old shingles skips inspecting the underlying wooden deck. It also traps internal heat, shortening new material life by up to 20%, and adds excessive weight to rafters.
- Ignoring attic ventilation requirements: Inadequate airflow traps warm, moist air inside your attic space. This cooks shingles from below in summer and forms internal winter attic frost, rotting structural roof trusses and voiding manufacturer material warranties.
- Reusing old flashing components: Reusing corroded or bent step flashing around chimneys and sidewalls to save a few dollars leads directly to interior wall leaks down the line. Demand fresh metal flashing on every installation.
Sources: Flat roof
Frequently asked questions
How long does a roof replacement take?
Most standard residential roof replacements on single-family homes are completed in one to two business days. Large properties, steep roof slopes, intricate multi-dormer designs, or heavy slate and tile installations can extend work to five days or longer.
Do I need a permit for a new roof?
Yes, municipal building departments require permits for structural roof replacements to verify work complies with local wind resistance and fire safety codes. Reputable contractors include permit acquisition fees inside their initial cost proposal and coordinate required town inspections.
How often should a roof be replaced?
Standard architectural asphalt roofs require replacement every 20 to 25 years. Metal systems typically last 40 to 70 years, while tile and natural slate roofs can endure for 50 to 100 years or more with regular maintenance.
Does a new roof increase home value?
Installing a fresh roof provides strong return on investment, recovering roughly 60% to 70% of project costs in added home equity during resale. It also prevents buyers from demanding steep repair credits during structural house inspections.
What are signs I need a roof replacement?
Key warning signs include curling shingle edges, excessive dark granule accumulation in gutters, sagging wooden rafter lines, water stains on upper-floor ceilings, or daylight showing through attic boards.
Is roof replacement tax deductible?
Replacing a roof on a primary residence is considered a capital improvement rather than a tax deduction, though it adds to your tax basis when selling your property. However, installing qualified energy-efficient metal roofs or integrated solar tiles may make you eligible for federal energy efficiency credits. Consult a tax professional to determine how capital improvements affect your personal tax situation.
Business & Growth
High Yield Checking Accounts: A Smart Money Move
A high yield checking account can transform how your everyday money works for you. Instead of letting your cash sit idle, these accounts offer significantly higher interest rates, allowing you to earn more on your liquid funds.

A high yield checking account is a deposit account that pays interest rates significantly above national averages—often 3.50% to 5.00% APY—while offering full debit, bill-pay, and ATM access. Unlike traditional checking accounts paying near 0.07%, these accounts let your everyday spending cash grow without sacrificing liquidity or lock-in periods.
What is a high yield checking account?
A high yield checking account functions as a hybrid financial tool. It provides the full transactional capability of a traditional bank account—including debit card usage, paper checks, online bill payment, and direct transfers—while yielding interest rates historically associated with long-term savings vehicles. Standard checking accounts at traditional brick-and-mortar financial institutions pay a national average interest rate hovering around 0.07% APY. In contrast, a high yield checking account can return between 3.50% and 5.00% or more on qualifying balances.
The primary appeal of this account type lies in continuous liquidity. While certificates of deposit lock away money for fixed terms and high-yield savings accounts may restrict certain daily transaction routines, high-yield checking accounts are designed for active cash flow. Interest is typically calculated on your average daily balance and credited monthly, allowing everyday operating capital to compound continuously.
Deposits in these accounts receive the same federal protection as standard bank products. Accounts at commercial banks are FDIC-insured up to $250,000 per depositor, while credit union accounts carry identical coverage through the National Credit Union Administration (NCUA). This structure eliminates principal risk while keeping cash accessible for living expenses.
How banks offer high interest rates on checking accounts
Financial institutions do not pay elevated interest rates out of goodwill. Higher APYs stem directly from specific operational models and consumer behavior patterns that drive bank profitability.
Online banks and regional credit unions frequently offer the highest rates because they operate with lower overhead expenses. Without the cost of maintaining physical branch networks, leasing storefronts, and staffing teller counters, online financial institutions pass operational savings back to account holders through enhanced yield structures.

Beyond low overhead, banks use high yield checking to incentivize engagement. When you process a point-of-sale debit transaction, the merchant pays an interchange fee to your card-issuing bank. By requiring a set number of debit card purchases each month, the bank collects enough interchange revenue to offset the cost of paying a high APY. Also, requiring direct deposits ensures a reliable influx of liquidity that the institution can use for overnight lending and reserve requirements. According to financial data tracked by CNBC Select, top high-yield accounts offer APYs ranging from 3.75% to over 5.00% on qualifying balances precisely because these customer activities generate reliable revenue streams.
What requirements are needed to qualify for the maximum APY?
To receive the advertised top-tier interest rate, account holders must meet specific monthly activity benchmarks during each statement cycle. Failing to complete these steps usually drops your earning rate down to a baseline rate, often between 0.01% and 0.05%, for that specific month.
Direct deposit minimums
Most institutions require at least one qualifying direct deposit per statement period, typically totaling between $500 and $1,000. Qualifying direct deposits generally include automated clearing house (ACH) transfers from employers, government benefits, or pension payouts. Peer-to-peer transfers from services like Venmo or PayPal usually do not meet bank definitions for direct deposit.
Debit card transaction counts
Accounts commonly require between 10 and 15 point-of-sale debit transactions per month. To count toward the qualification total, these purchases must settle before the final business day of your statement cycle. Pending transactions that do not fully clear until the following month will not count toward the current cycle’s total.
Digital account management
Banks usually require customers to opt out of paper statements in favor of e-statements. Some institutions also require at least one monthly login to their mobile app or online banking platform to maintain active status.
Balance caps and interest tiers
High yield checking accounts apply their maximum APY up to a defined account limit, known as a balance cap. Common balance caps range from $10,000 to $25,000. Funds held above this threshold earn a lower secondary rate. For example, an account might pay 5.00% APY on the first $15,000 and 0.20% on any balance exceeding $15,000. Some institutions, such as Presidential Bank Advantage Checking noted by Source: WalletHub, cater to higher balances by offering competitive structures on larger balances.
How to choose the right account for your spending habits
Finding the right high yield checking account requires matching bank terms against your existing monthly habits rather than altering your lifestyle to satisfy a bank requirement.
- Evaluate the APY relative to balance caps: Compare the maximum interest rate alongside the dollar threshold. An account paying 5.00% capped at $5,000 generates $250 annually, whereas an account paying 4.00% capped at $25,000 generates up to $1,000 per year. Choose an account whose cap aligns with your regular cash reserves.
- Audit your debit card usage: Review your recent bank statements to see how many times you naturally use a debit card. If you rely primarily on rewards credit cards for daily purchases, meeting a requirement of 15 debit transactions per month may force inconvenient spending adjustments.
- Review ATM access and fee reimbursements: Online institutions rarely maintain widespread physical ATM networks. Verify whether the bank belongs to nationwide networks like Allpoint or MoneyPass, or if they offer monthly out-of-network ATM fee reimbursements (often capped between $10 and $25 per month).
- Check fee structures and waiver rules: Confirm that the account charges no monthly maintenance fees, or that fee waiver requirements are easy to meet. High monthly maintenance fees quickly erase interest gains.
- Examine digital tools and mobile deposit limits: Ensure the bank offers functional mobile check deposits, fast external transfer capabilities, and online bill-pay options to support smooth daily cash flow management.
High yield checking accounts compared to other options
Selecting the proper banking vehicle requires understanding how high yield checking differs from traditional checking accounts and dedicated online savings accounts.
| Feature / Account Type | High-Yield Checking | Traditional Checking | High-Yield Savings |
|---|---|---|---|
| Typical APY Range | 3.50% – 5.00%+ | 0.01% – 0.07% | 4.00% – 5.25%+ |
| Monthly Activity Requirements | Common (Debit uses, direct deposit) | Rare for interest (Common for fee waivers) | Rare |
| Monthly Maintenance Fees | Usually $0 if active | $10 – $15 (Waived with conditions) | Usually $0 |
| ATM & Debit Card Access | Full debit card and ATM privileges | Full debit card and ATM privileges | Limited or no debit card/ATM access |
| Transaction Limits | Unlimited daily transactions | Unlimited daily transactions | May limit withdrawals per month |
| Best Uses | Everyday spending and operational cash | Basic in-person branch services | Dedicated emergency reserves |
High yield checking vs. high yield savings accounts
The primary difference between a high yield checking account and a high yield savings account lies in transactional capability. High yield savings accounts offer competitive APYs with minimal monthly requirements, but they do not provide personal check-writing capabilities or direct point-of-sale debit access. While federal regulations no longer mandate a strict six-withdrawal monthly limit on savings accounts under Regulation D, many financial institutions still impose internal limits or fees on frequent outgoing savings transactions.
High yield checking accounts permit unlimited transactions and provide direct debit card access, making them better suited for everyday expenses. However, savings accounts generally offer high APYs on much larger balances without requiring debit transaction quotas.
Who benefits most from high yield checking?
High yield checking accounts fit specific financial profiles and money management styles.
- Consistent daily debit users: People who regularly make small daily purchases—such as groceries, public transit, or coffee—easily hit 10 to 15 monthly transactions without changing their buying habits.
- Individuals carrying moderate cash buffers: Consumers who maintain between $3,000 and $20,000 in checking to cover upcoming bills earn meaningful passive returns on money that would otherwise earn nothing.
- Savers seeking simplified cash management: Combining earning power and spending access in one place eliminates the need to manually transfer funds back and forth between separate checking and savings accounts throughout the month.
Consider the example of Sarah, a recent graduate who needs her funds accessible for rent and upcoming moving expenses while still wanting to earn interest. Because her job direct-deposits her paycheck and she regularly uses her debit card for daily purchases, she automatically satisfies account requirements, earning yield on her operational cash without locking up funds.

Who should consider alternatives?
High yield checking is not ideal for everyone:
- Credit card rewards optimizers: If you put all expenses on cash-back or travel credit cards to earn 2% to 5% in rewards, switching transactions to a debit card just to satisfy checking requirements can result in a net financial loss.
- Cash-heavy depositors: People who frequently deal in physical cash need access to local branch networks and cash-accepting ATMs, which online high-yield institutions rarely provide.
- High-net-worth liquidity managers: If you hold $50,000 or more in liquid cash, balance caps (e.g., $10,000) mean most of your money will earn standard low rates. Dedicated high-yield savings accounts, money market funds, or short-term Treasury bills offer higher yield across unlimited balances.
Common mistakes that reduce your return
Maximizing the benefits of a high yield checking account requires avoiding operational errors that forfeit interest payouts or incur unnecessary fees.
Assuming pending transactions count
Debit card purchases must completely settle before the final day of your statement cycle. If you make your 15th debit purchase on the last evening of the month, that transaction will likely sit as “pending” until the next cycle, causing you to miss the monthly qualification threshold and lose your top APY for the entire period.
Ignoring the math on credit card rewards
Shifting spending from credit cards to debit cards carries an opportunity cost. For instance, making 15 monthly debit card transactions totaling $1,000 might earn you $35 per month in checking interest. Always calculate the net difference before altering payment habits.
Tax implications on earned interest
Interest earned in a high yield checking account is treated as taxable income by the IRS and state tax authorities. If you earn more than $10 in interest during a calendar year, your financial institution will issue Form 1099-INT. You must report this earnings on your annual income tax return, where it is taxed at your ordinary income rate.
How to integrate high yield checking into your financial system
To maximize financial yield without introducing manual effort, structure your cash flow around an automated deposit and transfer schedule.
- Direct paycheck routing: Set up your employer payroll to route your primary salary directly into the high yield checking account to satisfy the monthly direct deposit requirement automatically.
- Automate fixed bill payments: Configure recurring living expenses—such as rent, mortgage, utilities, and insurance—to draft directly from the high yield checking account. Because your balance earns interest until transactions clear, keeping cash in checking right up to bill due dates maximizes daily interest accrual.
- Establish automated sweep transfers: Monitor your target checking buffer. Once your account balance reaches the maximum high-yield cap (for instance, $15,000), set up an automated monthly transfer to sweep excess funds into a high-yield savings account or investment portfolio. This ensures every dollar earns the highest possible return without sitting idle above tier caps.
Frequently asked questions
Are high yield checking accounts safe?
Yes. High yield checking accounts at banks are insured by the FDIC, and those at credit unions are insured by the NCUA up to $250,000 per depositor. This legal guarantee protects your principal balance against institutional insolvency.
What happens if I miss the requirements for a month?
If you fail to meet monthly criteria like debit card transaction counts or direct deposits, you will not lose your principal balance. Instead, your balance earns the account’s baseline interest rate (typically 0.01% to 0.05%) for that specific statement cycle before resetting the following month.
Is interest from high yield checking accounts taxable?
Yes. Interest earned on bank accounts is taxed as ordinary income. Banks issue Form 1099-INT at the end of the tax year if your account earns $10 or more in interest.
Do high yield checking accounts charge monthly fees?
Most online high yield checking accounts do not charge standard monthly maintenance fees. However, some brick-and-mortar institutions impose fees if minimum balance conditions or monthly deposit rules are not met.
Can I write checks from a high yield checking account?
Yes. High yield checking accounts include full checking features, allowing you to write paper checks, set up online bill pay, and execute direct transfers just like standard checking accounts.
Business & Growth
NerdWallet Careers: Navigating Your Path to FinTech Impact
NerdWallet careers offer a unique opportunity to shape the future of personal finance. This guide explores the company culture, benefits, and how to successfully navigate the application process.

NerdWallet careers offer remote-first positions across software engineering, product management, data analytics, content publishing, and sales, with salaries ranging from $70,000 for entry-level roles to over $150,000 for senior positions. The company operates a consumer finance platform designed to help users compare credit cards, personal loans, mortgages, insurance, and investment tools.
Employees operate within a work environment built on candid communication, continuous learning, and structured remote operations. The company emphasizes direct feedback, independent problem-solving, and documented asynchronous collaboration across time zones.
The rest of this guide outlines NerdWallet’s work culture, specific departmental roles and compensation, employee perks and benefits, and the six-stage application and interview process.
NerdWallet Careers: Roles, Salary Ranges, and Interview Guide
NerdWallet careers offer remote-first positions in software engineering, product management, data analytics, content publishing, and sales, centered on financial clarity and candid collaboration. Candidates undergo a multi-stage hiring process lasting four to eight weeks, with salaries ranging from $70,000 for entry-level roles to over $150,000 for senior positions.
When evaluating a position in financial technology, understanding an organization’s internal workflows, cultural expectations, and interview evaluation criteria dictates success. Working at NerdWallet means contributing to a consumer finance platform that helps users compare credit cards, personal loans, mortgages, insurance, and investment tools. Employees, often called “Nerds,” work within a framework built on transparent communication, continuous professional development, and structured remote operations.
What is it like working at NerdWallet?
NerdWallet operates as a remote-first company, meaning day-to-day operations, project planning, and cross-functional meetings occur primarily online rather than in a centralized physical office. The company adopted this model to expand its talent search across regions and provide flexible scheduling options for staff.

Daily workflow and communication expectations
Because employees work across different time zones, communication relies heavily on structured written documentation and asynchronous collaboration tools. Teammates document decision-making processes in written proposals, shared project boards, and central repositories rather than relying on spontaneous verbal check-ins. Daily tasks require clear self-scheduling, initiative, and disciplined time management. While teams gather occasionally for strategic planning sessions or company events, the default working state remains remote.
Who this work environment suits—and who should avoid it
The remote-first structure works best for self-directed professionals who express ideas clearly in writing and manage their time without daily over-the-shoulder supervision. If you thrive on independent problem-solving and open feedback, you will likely adapt well. However, this environment does not suit everyone. If you rely on daily in-person interaction to stay motivated, prefer strict top-down supervision, or take direct constructive feedback personally, you may struggle within this company structure.
What core values define the company culture?
The workplace culture at NerdWallet emphasizes high performance, constructive feedback, and mutual support across teams. Rather than encouraging internal competition, management focuses on three central cultural pillars.
Candid communication and respectful critique
Employees are expected to speak openly about operational challenges, technical hurdles, and product ideas. In team discussions, staff members challenge assumptions using data and user analytics rather than corporate hierarchy or titles. Providing direct, candid critique in a respectful manner is considered an essential skill, allowing teams to identify flaws in strategy early before products launch.
Intellectual humility and continuous learning
NerdWallet explicitly values staff members who acknowledge what they do not know. Leaders and team members are encouraged to ask questions, admit mistakes, and seek help rather than pretending to possess immediate answers. This commitment to humble inquiry prevents costly missteps and creates an environment where failure is treated as a learning opportunity. It’s a culture where the mission to empower financial decisions drives collective effort.
Diversity, equity, and inclusion initiatives
Diversity, equity, and inclusion (DEI) practices are integrated into hiring strategies, employee resource groups (ERGs), and internal advancement programs. The company uses structured interview rubrics to minimize subconscious bias during candidate evaluation. Active employee resource groups offer community building and professional networking for underrepresented identities, while ongoing internal workshops focus on equitable mentorship and workplace inclusion.
What jobs and departments does NerdWallet hire for?
NerdWallet hires across technical, commercial, creative, and operational departments. Compensation varies based on functional specialization, candidate experience, and role seniority.
Engineering and data science
Software engineers build, scale, and secure web applications, mobile tools, and backend infrastructure that support consumer comparisons across credit cards, loans, and investment products. Data scientists and data engineers build data pipelines, tracking frameworks, and analytical models to personalize user tools. Average base salaries for software engineers range between $130,000 and $150,000 annually, with senior and staff engineers earning higher compensation packages that include equity components.
Product management and UX design
Product managers establish feature roadmaps, define user requirements, and coordinate engineering resources to improve site functionality and conversion rates. Product designers focus on user experience (UX) and interface design, ensuring complex financial calculators and guides remain simple to use. Base salaries for senior product managers often exceed $150,000 depending on product scope and technical complexity.
Editorial, content strategy, and search engine optimization
Content strategists, financial editors, and search engine optimization (SEO) specialists research, draft, and optimize consumer finance guides. Marketers manage organic search traffic, paid acquisition channels, email newsletters, and affiliate partnerships to grow audience reach. Entry-level content and marketing roles start around $70,000 per year, while mid-level and senior specialists earn higher compensation based on channel ownership.
Sales and business development
Account executives, affiliate marketing managers, and business development leads handle commercial relationships with financial institutions, credit card issuers, and mortgage lenders featured on the site. Account executives in mid-market roles earn average base salaries ranging from $80,000 to $96,000, which are typically paired with performance incentive structures.
What perks and benefits do employees receive?
NerdWallet offers a benefits package structured to support long-term physical, financial, and professional well-being.

Health care and personal wellness
- Medical, dental, and vision insurance coverage for employees and eligible dependents.
- Mental health support resources, including access to therapy networks and personal counseling services.
- Family planning support and paid parental leave policies for new parents.
Financial compensation and savings
- Competitive base salaries accompanied by annual performance and compensation reviews.
- 401(k) retirement savings plans featuring company matching contributions.
- Financial wellness tools and direct access to personal financial advisory resources.
Professional development and leave policies
- Generous paid time off (PTO) policies that support work-life balance and rest.
- Dedicated learning budgets covering courses, industry certifications, conferences, and tuition reimbursement.
- Structured internal mentorship programs to help employees move between teams or advance into leadership roles.
How does the application and interview process work?
Applying for positions through NerdWallet careers involves a structured six-stage hiring funnel designed to test technical proficiency, communication skills, and values alignment. The full hiring timeline typically spans four to eight weeks.
- Online application submission: Submit a targeted resume and optional cover letter through the company’s job site. Align your application materials directly with the specific requirements and responsibilities outlined in the job description.
- Recruiter phone screen: Complete a 15- to 30-minute introductory phone interview with a recruiter. This conversation reviews your background, salary expectations, remote work preferences, and interest in consumer finance.
- Hiring manager interview: Meet virtually with the hiring manager to discuss your domain expertise, past project achievements, and experience working in remote or cross-functional team settings.
- Technical or functional assessment: Undergo a skill assessment tailored to your specialty. Engineering candidates take part in live coding challenges or system design reviews. Data analysts complete analytical case studies, while product and marketing candidates present responses to take-home strategy prompts.
- Behavioral and values interview: Complete a structured interview evaluating cultural alignment. Assessors examine how you handle constructive criticism, address project failures, and work collaboratively with others. Prepare concrete examples using the STAR method (Situation, Task, Action, Result).
- Final leadership round: Speak with senior leaders to demonstrate your strategic vision, high-level problem-solving abilities, and overall fit within the company’s long-term operational goals.
How to prepare for NerdWallet interview questions
Interview preparation requires mastering both practical job skills and value-driven behavioral scenario questions. Evaluators look for concrete proof of past achievements rather than broad theoretical assertions.

Structuring behavioral responses using the STAR method
When answering behavioral questions, structure your responses systematically:
- Situation: Describe the specific context, project scope, or operational challenge you faced in a past role.
- Task: State your exact responsibility in resolving the situation.
- Action: Detail the specific steps you took, emphasizing clear communication, technical tools, and collaboration.
- Result: Share measurable results, performance metrics, or key takeaways from the outcome.
Demonstrating candidness and humility
Expect questions asking you to describe a mistake, a project that missed its goal, or a scenario where you lacked technical knowledge. Focus on complete honesty. Describe how you identified the mistake, communicated clearly with your team, sought assistance, adapted your plan, and implemented preventive measures for future work. Blaming former coworkers or denying past mistakes will harm your standing in the interview.
Technical and role-specific preparation
For software engineering positions, review fundamental data structures, algorithmic efficiency, and distributed system design principles. Practice explaining your logic aloud while writing clean code during technical screens. For product and marketing roles, practice breaking down complex user acquisition or feature adoption problems into logical, data-informed decision steps.
What common mistakes cause candidates to fail?
Avoiding standard candidate errors helps you move through the hiring stages cleanly without early disqualification.
- Submitting generic applications: Submitting un-tailored resumes that fail to reference specific role requirements or company goals reduces your chances of passing initial automated and recruiter screens.
- Failing to provide specific interview anecdotes: Giving broad, vague responses during behavioral interviews without using concrete STAR-format examples makes it difficult for evaluators to score your competence.
- Neglecting live technical preparation: Relying solely on past resume credentials without practicing practical coding challenges, system architecture whiteboard sessions, or data analysis case studies often leads to poor technical scores.
- Failing to show strong remote communication skills: Demonstrating disorganized verbal answers or poor written follow-up during interview coordination raises concerns about your ability to work autonomously in a remote-first setting.
Sources: Careers Info
Frequently asked questions
What is the average salary range for NerdWallet positions?
Salaries vary depending on job function and seniority. Entry-level roles start around $70,000 per year, while mid-market account executives earn between $80,000 and $96,000. Software engineering roles generally range from $130,000 to $150,000, with senior positions commanding higher base pay and equity.
Is NerdWallet strictly a remote-first company?
Yes, NerdWallet operates as a remote-first business, allowing employees to perform their work virtually from approved locations. While teams gather occasionally for strategic workshops or corporate events, day-to-day operations are handled online.
How long does the NerdWallet hiring process take?
The recruitment process usually takes four to eight weeks from your initial application submission to a final offer decision. This timeframe covers recruiter screens, technical assessments, behavioral values interviews, and executive interviews.
What benefits and perks does NerdWallet offer?
NerdWallet provides full medical, dental, and vision coverage along with 401(k) matching, mental health support, and financial counseling. Additional perks include generous paid time off, parental leave, and dedicated budgets for professional development and tuition reimbursement.
How can candidates best demonstrate core values in interviews?
Candidates demonstrate values alignment by presenting honest, structured anecdotes using the STAR method. Share real examples of giving or receiving candid feedback, admitting knowledge gaps to learn new skills, and making project decisions that prioritize clear value for the end user.

Close Your Mind? Why It Actually Holds You Back

Richard Feynman’s Letter to His Wife: A Masterclass

Bird by Bird Anne Lamott: Lessons for Writing and Life

Nurturing Your Areca Palm Chrysalidocarpus: An Expert Guide

White Bird of Paradise: Mastering the Giant Indoor Plant

Beyond Inspiration: Life Is Too Short Quotes & Real Action
-
 Home & Living3 months ago
Nurturing Your Areca Palm Chrysalidocarpus: An Expert Guide
-
 Home & Living3 months ago
White Bird of Paradise: Mastering the Giant Indoor Plant
-
 Self-Improvement3 months ago
Beyond Inspiration: Life Is Too Short Quotes & Real Action
-

 Business & Growth3 months ago
Concrete Driveway Cost: Your Essential Budget Guide
-

 Home & Living3 months ago
Jacaranda Tree: Cultivating Vibrant Purple Blooms in Your Landscape
-

 Business & Growth3 months ago
Strategic Home Additions: Maximizing Value and Seamless Integration
-

 Home Improvement3 months ago
Beyond the Tank: Rethinking Septic System Alternatives
-

 Home & Living3 months ago
Areca Palm Care: Unlock Vibrant Growth for Your Indoor Oasis